
|
It is currently Wed Apr 24, 2024 4:06 pm |
|
All times are UTC - 8 hours |
 |
|
|
Page 1 of 1 |
[ 5 posts ] |
| Print view | Previous topic | Next topic |
Rebuilding a Ramsey winch (long winded, lotsa photos)
| Author | Message |
|---|---|
|
Site Supporter   Location: Duvall Joined: Thu Mar 17, 2011 Posts: 4604 Real Name: David |
A couple of months ago I came across a Ramsey winch for sale on here. After some negotiations and discovery that it didn't actually run, I got it for a pretty good deal. I figured at worst I had what looked to be a brand new cable and remote control for it and I might be able to fix the known electrical problems relatively cheaply. It's a Ramsey SE 12000 winch, which sell for $1400 new. This one wasn't new...
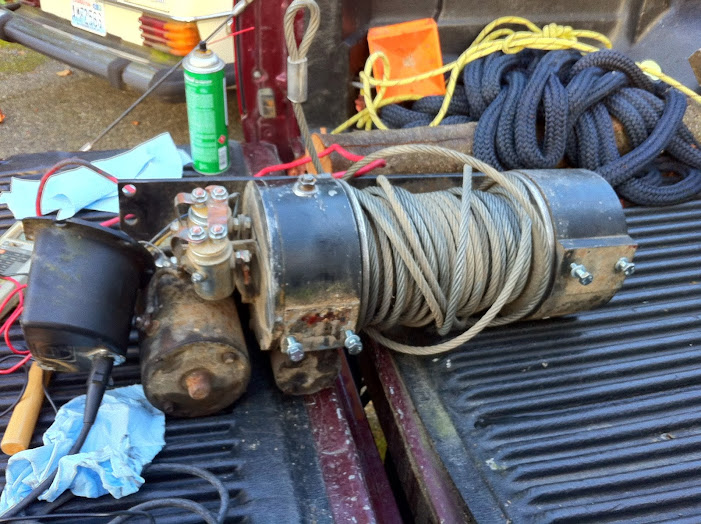 Let's start with what's wrong in this picture beyond the cable being a bit rat's nested. The off end of the winch (right side) is on upside down. You'll notice the amount of mud & debris everywhere, the solenoids are mounted upside down (not really a big deal, and the PO pointed it out to me), they're wired incorrectly, and as shown in this picture, not wired very well in the first place:  This joint in front was simply smashed down with a vise or visegrips, and you could wiggle the wire inside the lug (not so good for a high amperage application). This was pretty typical of all of the non factory lugs (most of them). The PPO (apparently a tow truck company), actually melted the positive terminal out of the plastic (also pointed out by the PO), and the replacement cable was similarly poorly made, so much so that I was actually able to pull the lug off with my fingers with just a bit of wiggling (not surprising it got hot enough to melt plastic). In this photo you can see where the mud line was inside the cable housing (which wasn't even attached anymore, it was just hanging on the winch): 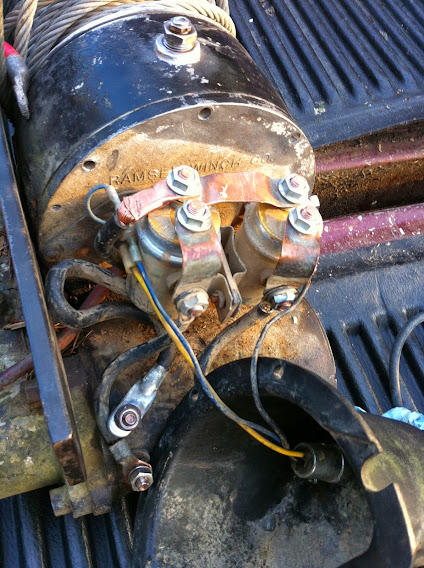 It took me several attempts to get the majority of the mud/grease mix off of the motor/gearbox housings. The one shining light in this whole project is that Ramsey provides excellent instruction manuals. The PO thought the motor was bad, but I suspected it had at least one bad solenoid (which are a whole lot cheaper to replace). I ran the bench tests on the solenoids (according to the instruction manual), and determined that one of them was marginal, and the other one was toast. I found a pair of them for a pretty reasonable price & had them shipped in. Here they are installed right side up: 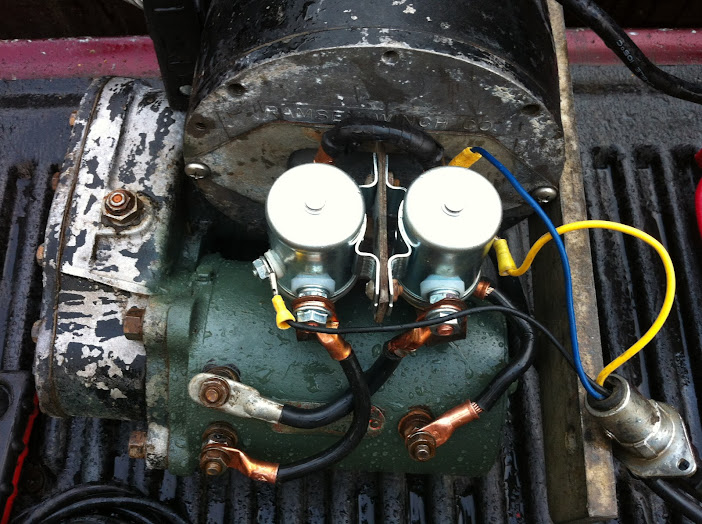 I made several new jumpers to connect the solenoids to the motor out of 4 AWG multi-strand copper & lugs. I soldered each of them, so they should be able to carry 105 amps continuous (motor is rated at 70 amps continuous, so plenty of overhead). It took me a while to figure out the proper connection to the motor after I'd bench tested it with the new jumpers & determined it was actually just fine (that would have been a large expense). Once again the excellent manual helped me get it wired properly and the leads for the remote wired up as well (the much-much smaller wires). I also got a coat of green enamel on the housing of the motor since it was largely the only piece of external steel & was rusty from the mud/grease it had had all over it. My next problem was that the drum clutch didn't operate. The operating handle had been broken off, and the PO told me he just used a pair of pliers to pull it out. Well...if you say so, but he must have been a lot stronger than me: 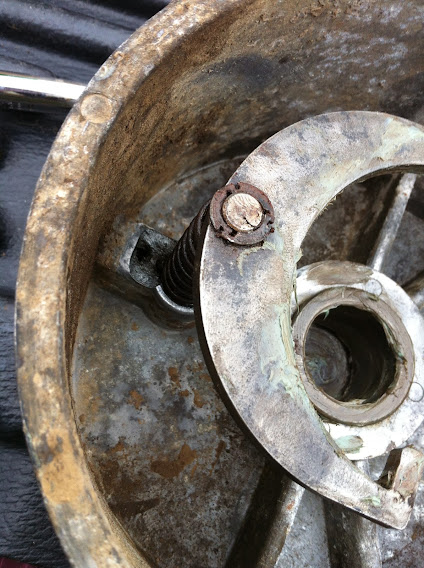 If you look close you can see why the clutch plunger didn't work properly, in the left side of the photo you can see where the pin that it rode on has broken out the side of the housing. The clutch itself was stuck so hard to the shaft that I had to pound it off with a block of wood and mallet just to get it to move: 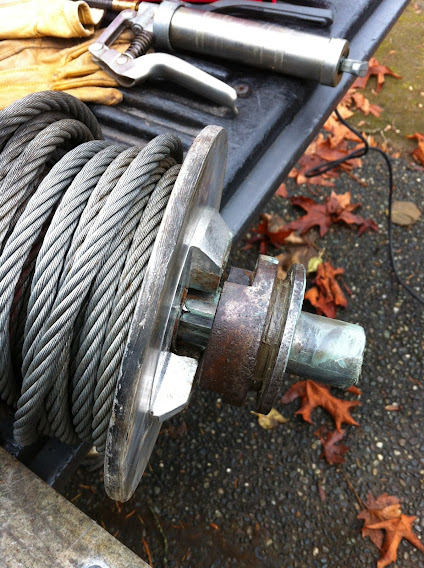 Here is is after I beat it free of the shaft. Here's a picture of the JB-Weld repair of the broken housing:  I've since cleaned up the seat, drilled out the pieces of wood (the obvious one showing, and another at 90 degrees to the shaft where the original set screw/pin had to be drilled out). That's been drilled & tapped for a 1/4-20 SS set screw (filed the last couple of threads off to make it fit the original pin track in the operating rod), and I've made a new handle out of a SS 1/4-20 cap screw & some Sugru (self hardening rubber stuff, very cool). So now the clutch works. Here's pretty much how it sits now:  Both ends of the winch are right side up, the cable has been wound in properly, the entire thing has been rewired properly (using a gauge higher than actually called for), new solenoids, clutch rebuilt so it works properly, there was only one last thing I needed to do before I considered the winch complete, check the oil levels in the spur & worm gear cases. Yeah...um...gear oil, hmm... I popped open the gear filler port on the worm gear (top center of the photo) and saw water sitting on top of the gear (but no rust). OK, well, it's been sitting out in the rain, so some condensation inside the gear housings shouldn't be too surprising. Opened the spur gear port (down & to the right from the first one), and same thing. Hmmm... Left the ports open one at a time and rolled the winch over to see what'd come out. Water, nice clean non-rusty water, which is good, but still just water. Now to be fair, the PO did tell me it'd been sitting on the bumper of his truck for three years, but I expected there would be some oil in the gear housings! I got a slight sheen of oil out of the spur gear housing, but just plain water out of the worm gear housing. Fortunately I'd only run the winch long enough to wind the cable back in properly and it definitely wasn't under load. So I drained them completely, and then filled them with the recommended oil from the manual. Then disengaged the clutch, and ran the winch forwards & backwards for several minutes each to splash oil everywhere inside the housings, as well as heat up the gears and motor to help drive condensation out. Next is getting the winch mounted on a piece of stout angle iron and mounting that to a 2" hitch extender so it can sit in my front hitch mount on my F-250. I'm going to use 2-3 #8 1/2" bolts to mount it to the hitch extender. I've ordered a fairlead, which should arrive tomorrow. Then I can drill the angle iron and mount everything. I've got a bunch more #4 AWG cable to make connections to my batteries. I'm also thinking about selling it, it's more winch than I need, but I might just keep it, you never know when a winch could come in handy. |
| Sun Dec 15, 2013 2:11 pm |
|
|
Site Admin   Location: Olympia, WA Joined: Fri Mar 11, 2011 Posts: 38309 Real Name: Dan |
Wow! One mans junk is another's treasure! Nice!
|
| Sun Dec 15, 2013 2:17 pm |
|
|
Site Supporter Location: Duvall Joined: Thu Mar 17, 2011 Posts: 4604 Real Name: David |
I like fixing stuff, but this was a bit more of a project than I was expecting. If I do keep it, it'll be mounted with a locking pin & bike lock to make it less attractive to asshole thieves. My brother had his Warn winch stolen right off the front of his Jeep Commando.
|
| Sun Dec 15, 2013 2:21 pm |
|
|
Site Admin  Location: Renton, WA Joined: Sun Mar 13, 2011 Posts: 52067 Real Name: Steve |
David, you've posted some pretty impressive projects here . . . including this one. You have some talent, sir.
 _________________ Steve Benefactor Life Member, National Rifle Association Life Member, Second Amendment Foundation Patriot & Life Member, Gun Owners of America Life Member, Citizens Committee for the Right to Keep and Bear Arms Legal Action Supporter, Firearms Policy Coalition Member, NAGR/NFGR Please support the organizations that support all of us. Leave it cleaner than you found it. |
| Sun Dec 15, 2013 3:00 pm |
|
|
Site Supporter Location: Duvall Joined: Thu Mar 17, 2011 Posts: 4604 Real Name: David |
Thanks Steve. I'm looking forward to posting about my latest project, a 1943 Colt 1911, once I get all the pieces together. I've never put one together before, and I bought it all in pieces from one of our own here on the site. Took me forever to figure out how to put it together (well, about 3 hours), and only then realize that I was still missing three pieces. However, I think I could put one together in about 30-45 minutes now without any methods of cheating (YouTube, online user manuals, etc.). I'm hoping the pieces get here tomorrow from Sarco, but I'm not holding my breath. I plan to take the whole thing back apart & start over so I can take pictures as I go (I promised the guy I bought the frame from that I would). If nothing else, it's a complete novice's eye view of putting one together. Brandon has offered to make sure I don't screw it up before I try to shoot it..
|
| Sun Dec 15, 2013 5:17 pm |
|
|
|
Page 1 of 1 |
[ 5 posts ] |
|
All times are UTC - 8 hours |
Who is online |
Users browsing this forum: No registered users and 28 guests |
| You cannot post new topics in this forum You cannot reply to topics in this forum You cannot edit your posts in this forum You cannot delete your posts in this forum You cannot post attachments in this forum |