
|
It is currently Thu Apr 18, 2024 3:21 am |
|
All times are UTC - 8 hours |
 |
|
|
Page 9 of 31 |
[ 454 posts ] | Go to page Previous 1 ... 6, 7, 8, 9, 10, 11, 12 ... 31 Next |
| Print view | Previous topic | Next topic |
1926 Model TT Restoration: Engine/Trans Rebuild
| Author | Message |
|---|---|
|
Site Admin   Location: Renton, WA Joined: Sun Mar 13, 2011 Posts: 52030 Real Name: Steve |
Dude, that is going to be SO COOL when you take that first drive down the road!
WaGuns members lining the street . . . ? _________________ Steve Benefactor Life Member, National Rifle Association Life Member, Second Amendment Foundation Patriot & Life Member, Gun Owners of America Life Member, Citizens Committee for the Right to Keep and Bear Arms Legal Action Supporter, Firearms Policy Coalition Member, NAGR/NFGR Please support the organizations that support all of us. Leave it cleaner than you found it. |
| Wed Apr 17, 2019 7:26 pm |
|
|
Site Supporter   Location: Tacoma Joined: Sat May 4, 2013 Posts: 6214 |
MadPick wrote: Dude, that is going to be SO COOL when you take that first drive down the road! WaGuns members lining the street . . . ? Well, they will if Jacy brings the expensive bourbon! |
| Wed Apr 17, 2019 7:40 pm |
|
|
Site Supporter  Location: Downtown Newcastle Joined: Sat Mar 5, 2016 Posts: 3447 Real Name: Traut |
MadPick wrote: Dude, that is going to be SO COOL when you take that first drive down the road! WaGuns members lining the street . . . ? 21 gun salute, minimum. _________________ I always thought growing old would take a lot longer..... So, when does that "Old enough to know better" shit kick in??? I've learned that pleasing everyone is impossible, but pissing everyone off is a piece of cake. |
| Wed Apr 17, 2019 8:20 pm |
|
|
Site Supporter Location: Snohomish Co Joined: Thu Sep 13, 2018 Posts: 1811 |
I think i already mentioned it, but make sure you torque the rear brakes down to whatever godaweful spec they say to. The tapered-key setup only works if there is proper pressure pushing the drum into the taper. It was the biggest failure of early v-8 rears in the day. I've talked to old timers that "kept an axle key in the glovebox", and ive seen my share of old axles that are scared up, including the '37 that is under the roadster i'm building now.
|
| Thu Apr 18, 2019 9:48 pm |
|
|
Site Supporter Location: Tacoma Joined: Sat May 4, 2013 Posts: 6214 |
shaggy wrote: I think i already mentioned it, but make sure you torque the rear brakes down to whatever godaweful spec they say to. The tapered-key setup only works if there is proper pressure pushing the drum into the taper. It was the biggest failure of early v-8 rears in the day. I've talked to old timers that "kept an axle key in the glovebox", and ive seen my share of old axles that are scared up, including the '37 that is under the roadster i'm building now. I got a big tool shaggy, and I will yank on it mightily! Thank you for the good advice you always have, sir! Clearly you have been under a car or two in your day! |
| Thu Apr 18, 2019 9:58 pm |
|
|
Site Supporter  Location: Thurston Joined: Tue Oct 28, 2014 Posts: 672 Real Name: yup |
Seat belts weren't standard equipment until 1964. Not the 50s. So screw that! We don't need no gubmint telling us how to live! And your car only goes 45 mph. Hydraulic brakes on a Ford? WTF? Desoto invented them, about 1931. But Ford didn't use them for years, you don't need that new fangled crap! Rod actuated brakes is all you need!
|
| Thu Apr 18, 2019 11:07 pm |
|
|
Site Supporter Location: Tacoma Joined: Sat May 4, 2013 Posts: 6214 |
gscott wrote: Seat belts weren't standard equipment until 1964. Not the 50s. So screw that! We don't need no gubmint telling us how to live! And your car only goes 45 mph. Hydraulic brakes on a Ford? WTF? Desoto invented them, about 1931. But Ford didn't use them for years, you don't need that new fangled crap! Rod actuated brakes is all you need! Well on the brakes I will have to disagree. Having some model t drive time under my belt, and having disassembled them, I feel much better with juice brakes. And sadly, my truck can’t make 45 mph even in ford high and warford overdrive. I have had it up to 35 flat out going downhill though. Felt like it was going to shake my teeth out! |
| Fri Apr 19, 2019 7:56 am |
|
|
Site Supporter Location: Tacoma Joined: Sat May 4, 2013 Posts: 6214 |
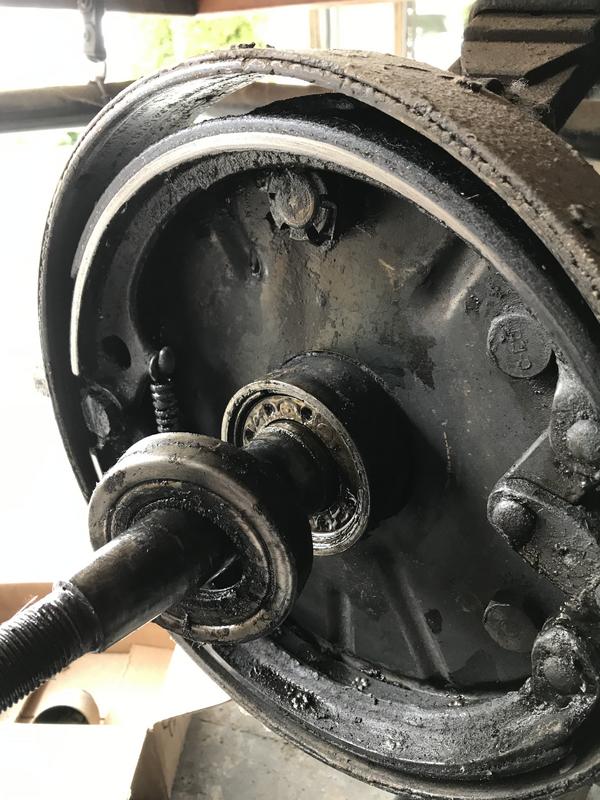
Well, the roller bearings aren’t going to come out without splitting the differential case, and I don’t want to do that. I will just drive the truck until the bearings won’t take any more. Unfortunately, this means I also can’t replace the inner axle seal, but I’m going to have to live with that too. All that’s left is to get a new outer seal kit, which I ordered today. It consists of a half-inch thick felt ring sandwiched between a washer and the cup that fits around the axle housing. It slides over the axle stub and the cup is tapped on to the housing. It’s purpose is to keep grease out of the emergency brake assembly. Here is the old outer seal coming off
 The new seal will look like this 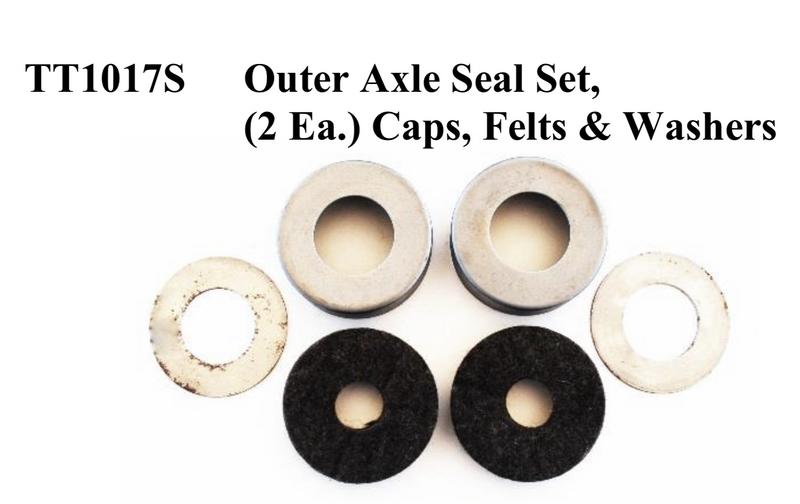 Turned my attention to the emergency brakes and backing plate. They were covered in so much grease I couldn’t tell what I had. 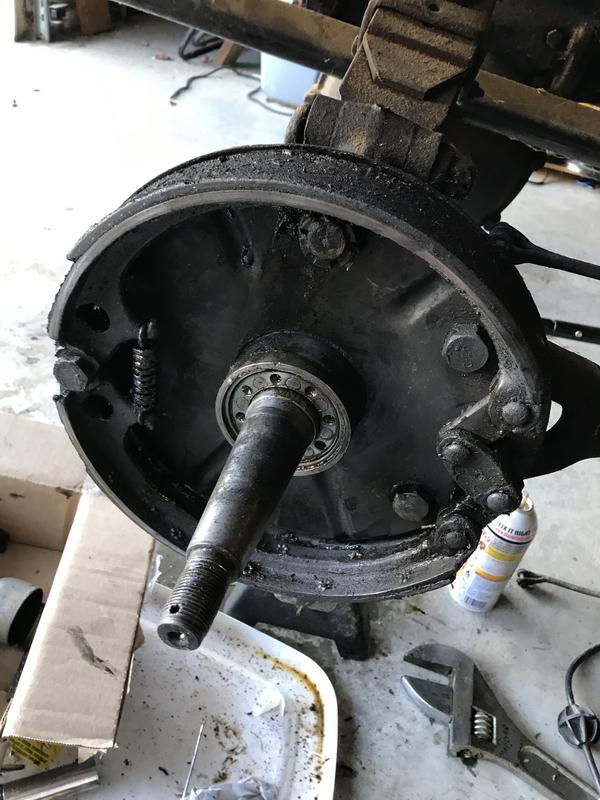 The e-brake shoes are connected to the actuating lever by a linkage. The shoes can be removed by disconnecting that linkage.  The other end of the shoes are spring loaded to clamp around a post. Very similar to more modern brake shoe designs.  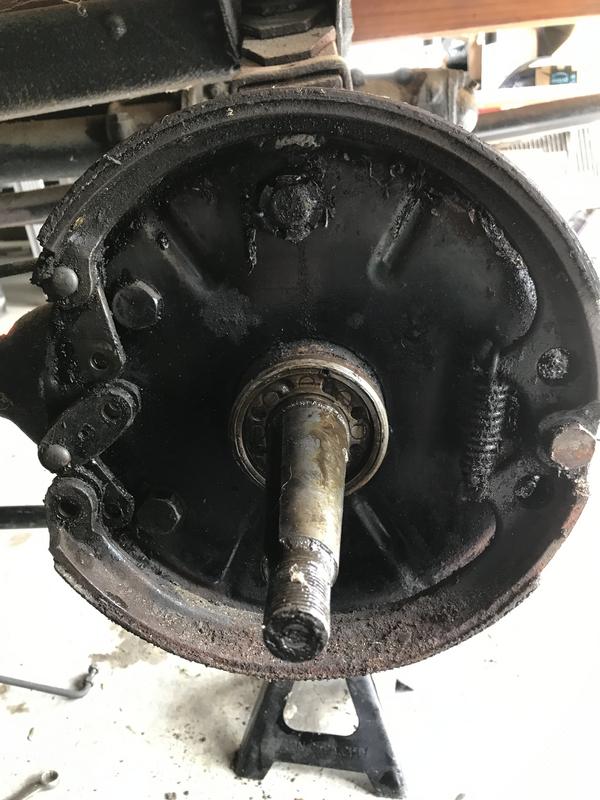 You just “fold up” the shoes to collapse the spring and lift the shoes off to expose the backing plate. 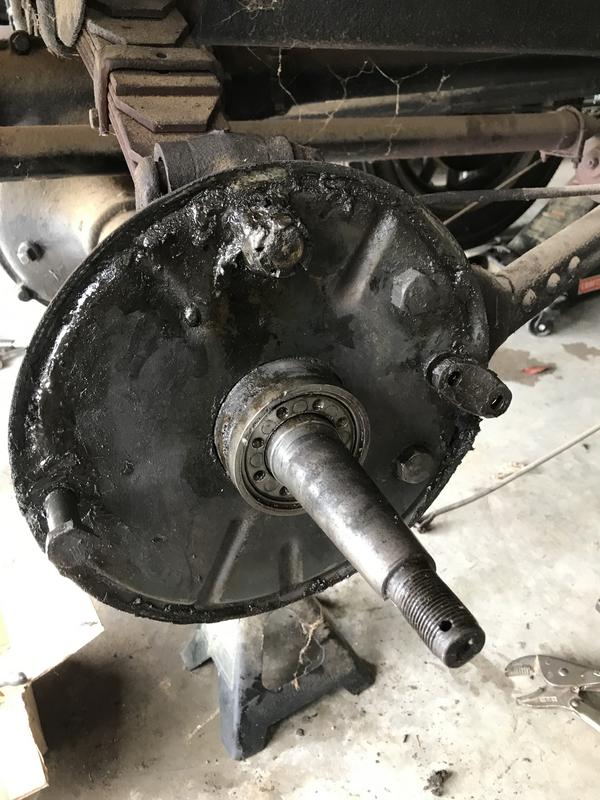 I dropped both sets of shoes into a container of gas to soak overnight, and went to work cleaning up the backing plate. 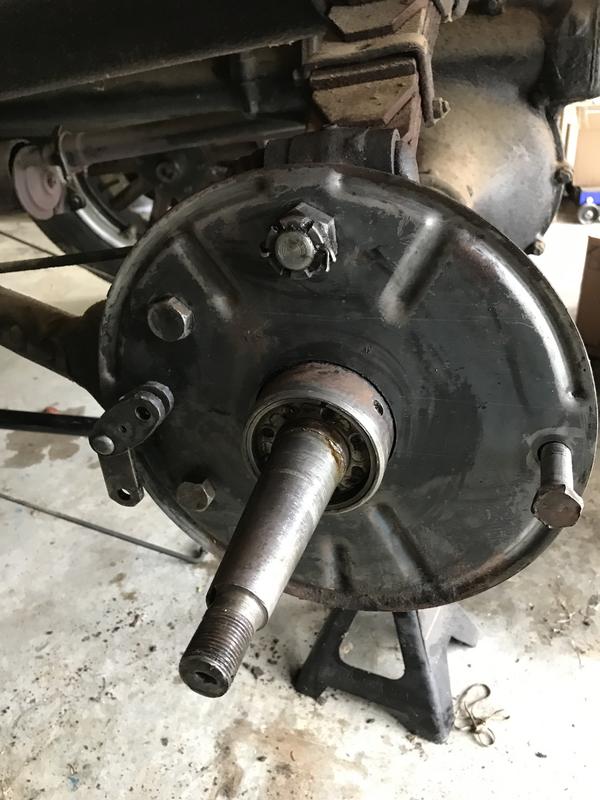 The shoes got a good wire brushing in gas, and a plastic brush to the lining material. Here they are cleaned up 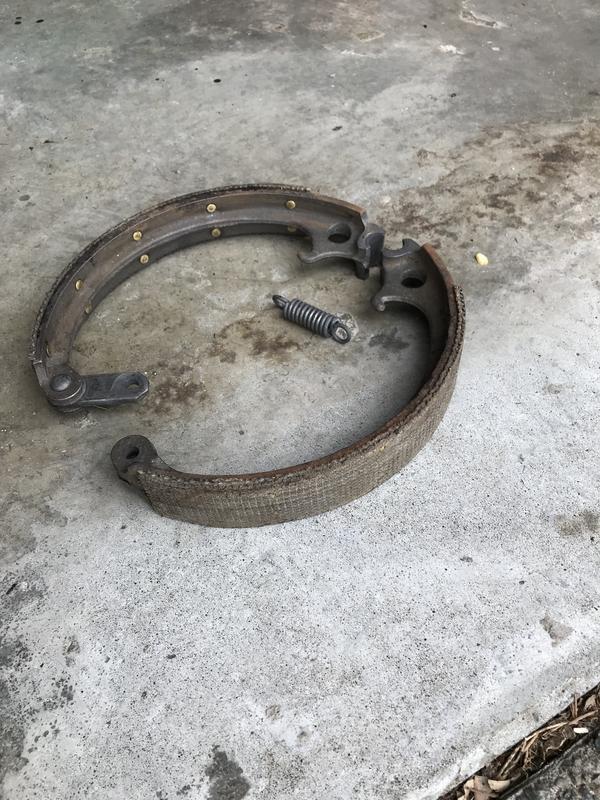 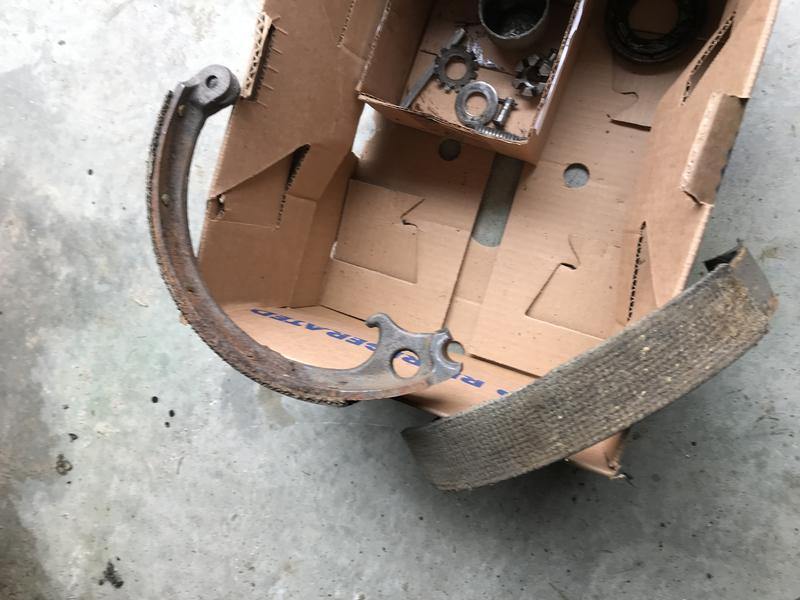 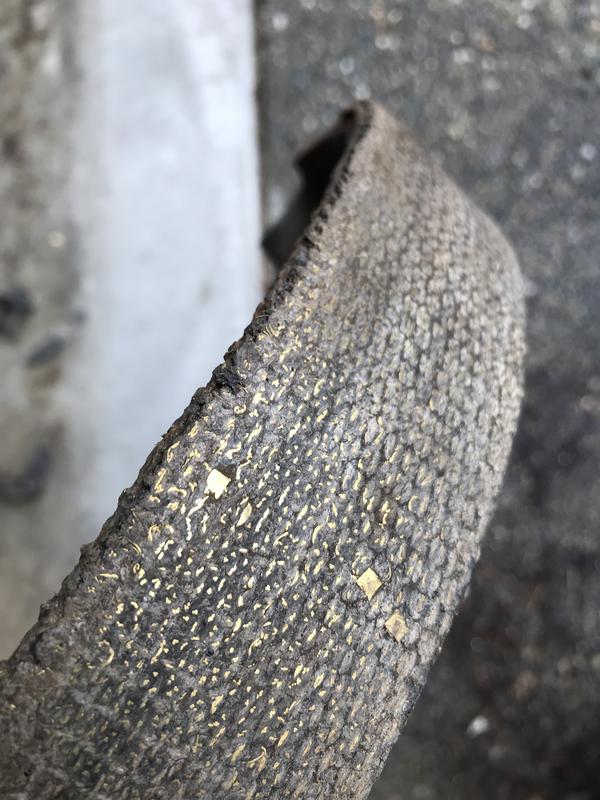 One of the four shoes was a factory part, per the Ford script mark you can barely make out here 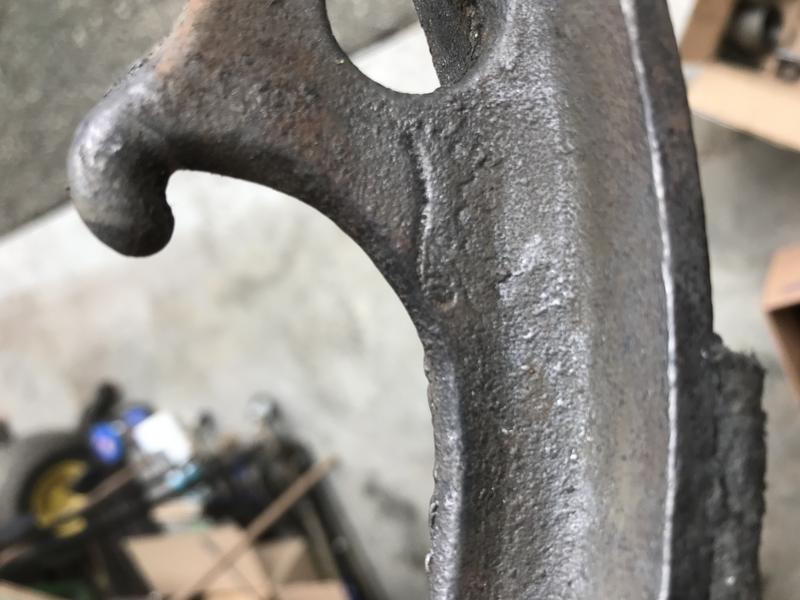 That’s all I can do until the seals and hydraulic brake kit arrives. The brake kit uses all new bolts, so no use in reassembling the emergency brakes now. My model t buddy came down today to take a look at the roller bearings, and also gave the truck a once over. He showed me several add-ons my truck had that were not factory. But they were all good things to have. He also suggested I move the ignition coil from its current position by the manifold to keep it cooler. Finally he showed me that the front wishbone is worn out. The wishbone keeps the front axle from racking and is critical to good handling. One end bolts to each side of the front axle and the other is held by a cup at the transmission hogshead. Here is a pic of one. The cars and trucks used the same wishbone 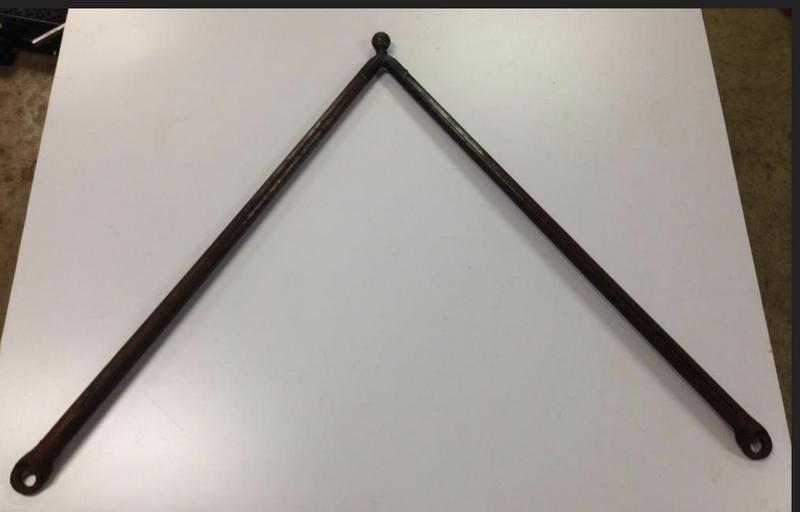 The ball on the end of the wishbone is the wear point. It goes from circular to oval as it wears, and introduces a lot of front axle slop. Here is my wishbone still installed in the truck 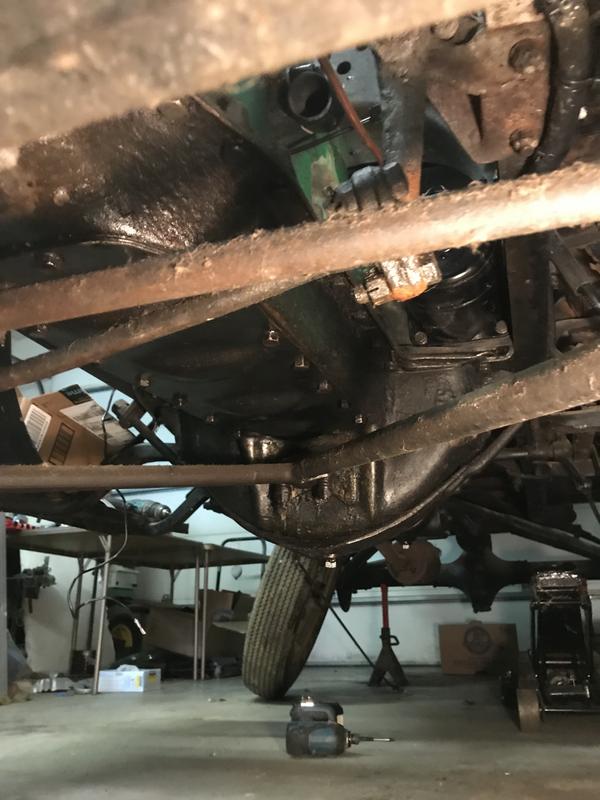 Here is where the problem is 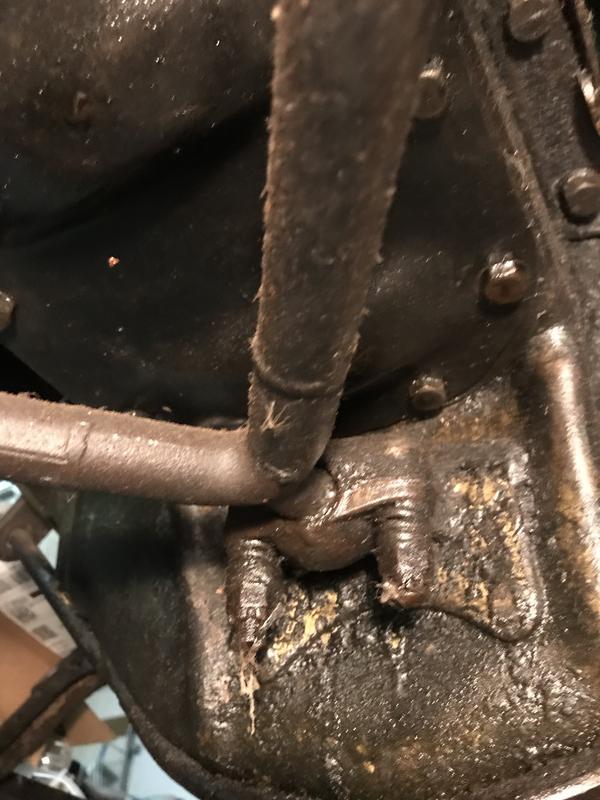 My buddy has both the wishbone and the cup assembly. My next job is to remove my wishbone and cup assembly, and head up to my buddy’s place for a replacement in better shape. I’m sure all will go smoothly, and nary a problem will crop up. Last edited by Arisaka on Wed May 08, 2019 9:52 pm, edited 1 time in total. |
| Fri Apr 19, 2019 11:21 am |
|
|
Site Supporter Location: Snohomish Co Joined: Thu Sep 13, 2018 Posts: 1811 |
Arisaka wrote: I got a big tool shaggy, and I will yank on it mightily! Thank you for the good advice you always have, sir! Clearly you have been under a car or two in your day! I'm actually a relatively young guy at 34, but i've been heavy into this stuff for a long time. As for the brakes, i'm not that up on model t mechanicals, but i could imagine on a heavy rig like that they may not be worth a crap, but i know the '32 brakes a friend of mine had under his roadster stopped pretty good, but ofcourse that is a totally different critter. I also saw him regularly crawl under it with a wrench to adjust them until he got them all dialed in togather. |
| Fri Apr 19, 2019 5:23 pm |
|
|
Site Supporter Location: Tacoma Joined: Sat May 4, 2013 Posts: 6214 |
Was looking at Craigslist for something entirely unrelated, and stumbled across this
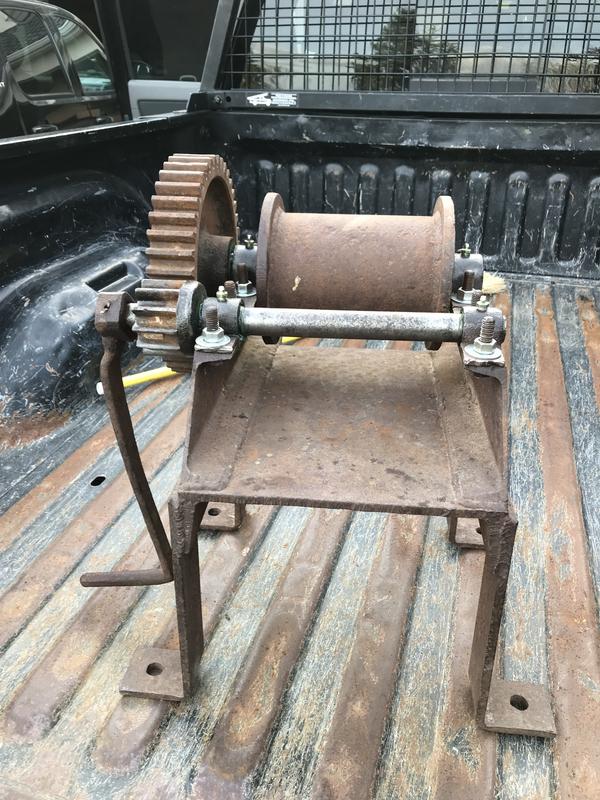 Thought it would look cool in the bed of the Model TT truck, so I spring for the $75 and bought it. Here are some more views 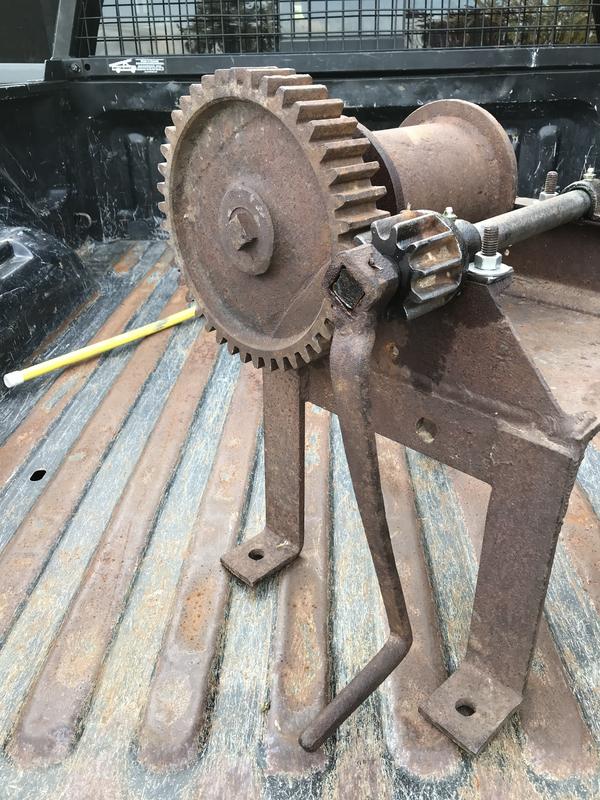   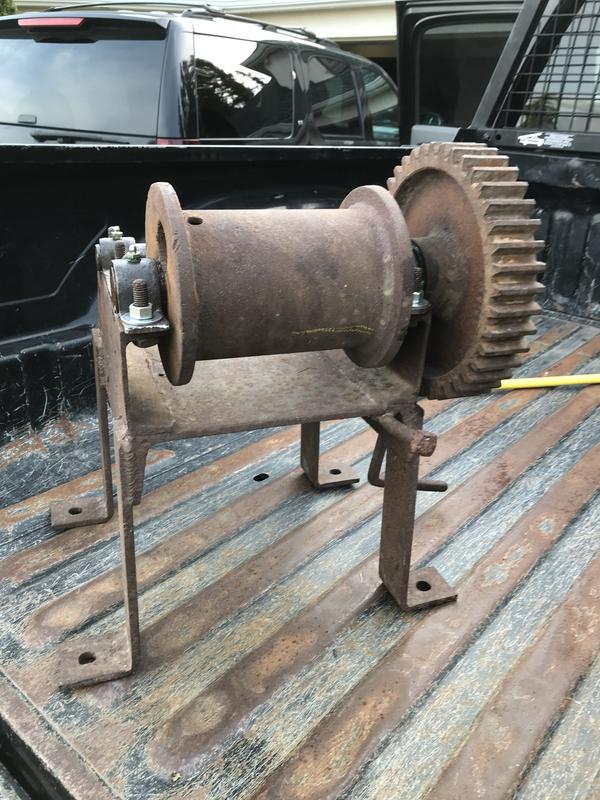 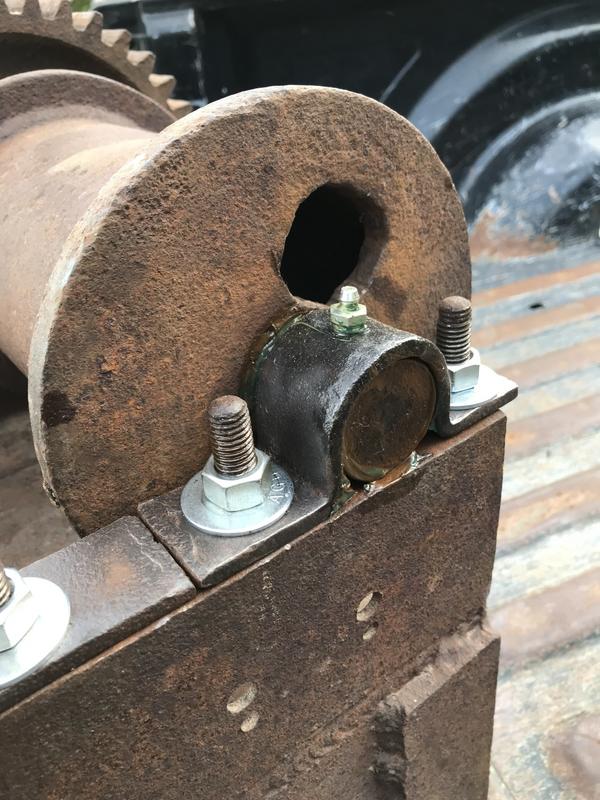 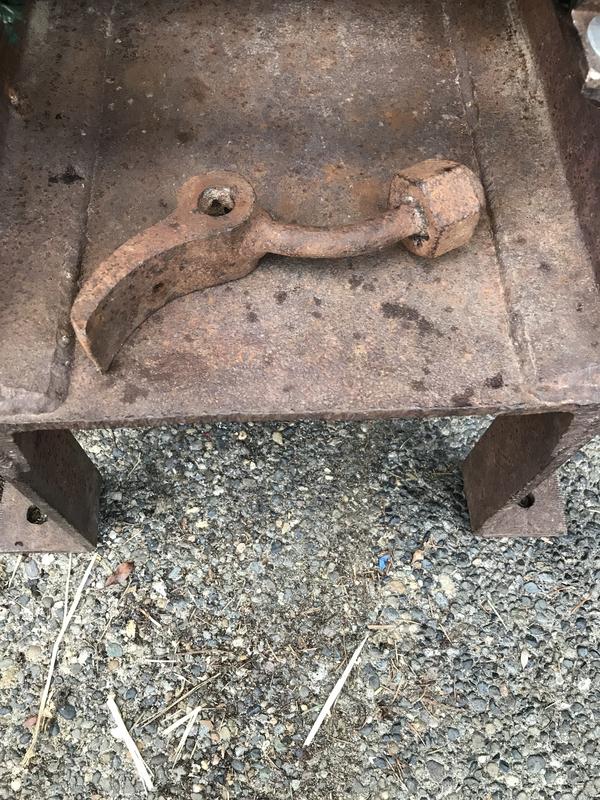 The previous owner just started to mess with it. He installed some zerks and greased it. I will be taking it completely apart. It operates, but I need to figure out how to mount the pawl, which is laying loose now. No apparent mounting holes for it. Might add a spring to the pawl. It looks to be gravity actuated right now. Also need to build some sort of cradle or mount for it. Need to elevate it some so the crank handle will clear the ground. Then some angle iron under the bed of the Model TT to anchor it. What I am going for is the look of some sort of recovery winch. This winch will probably never do any real work, but I’m hoping it will end up looking as if it could. Thinking of mounting it behind the cab, but am open to all suggestions on how and where to mount it. Give me some ideas! More to come on this bad boy! |
| Sun Apr 21, 2019 6:39 pm |
|
|
Site Supporter  Location: East of Japan, not by much. Joined: Fri Jun 3, 2011 Posts: 12990 |
Thanks to your project, I spotted a familiar shape in a box of junk at a garage sale on the weekend - an original Ford truck worm gear axle jack in perfect operating condition ! No jack handle, but for a couple of bucks, I scored a cool paperweight for the shop work bench. I'll post some pics soon.
_________________ Give a man a fish, and he will eat for a day. Give a man a fishing pole, and he will drink too much beer, get tangled in fish line, hook himself in the nose casting, fall overboard, and either drown, or, go home hungry and wet. Give a man a case of dynamite, and he will feed the whole town for a year! BE ON NOTICE: PRIVACY NOTICE: Warning - any person and/or institution and/or Agent and/or Agency of any governmental structure including but not limited to the United States Federal Government also using or monitoring/using this website or any of its associated websites, you do NOT have my permission to utilize any of my profile information nor any of the content contained herein including, but not limited to my photos, and/or the comments made about my photos or any other "picture" art posted on my profile. You are hereby notified that you are strictly prohibited from disclosing, copying, distributing, disseminating, or taking any other action against me with regard to this profile and the contents herein. The foregoing prohibitions also apply to your employee, agent, student or any personnel under your direction or control. The contents of this profile are PRIVATE and legally privileged and confidential information, and the violation of my personal privacy is punishable by law. UCC 1-103 1-308 ALL RIGHTS RESERVED WITHOUT PREJUDICE |
| Mon Apr 22, 2019 8:42 am |
|
|
Site Supporter Location: Tacoma Joined: Sat May 4, 2013 Posts: 6214 |
RENCORP wrote: Thanks to your project, I spotted a familiar shape in a box of junk at a garage sale on the weekend - an original Ford truck worm gear axle jack in perfect operating condition ! No jack handle, but for a couple of bucks, I scored a cool paperweight for the shop work bench. I'll post some pics soon. If you paid anything less than $50 you did well! |
| Tue Apr 23, 2019 8:28 pm |
|
|
Site Supporter Location: Tacoma Joined: Sat May 4, 2013 Posts: 6214 |
The front wishbone (radius rod) keeps the front axle from racking. Here it is
The legs of the wishbone bolt to each side of the front axle. The other (ball) end of the wishbone fits in a cup riveted to the oil pan. 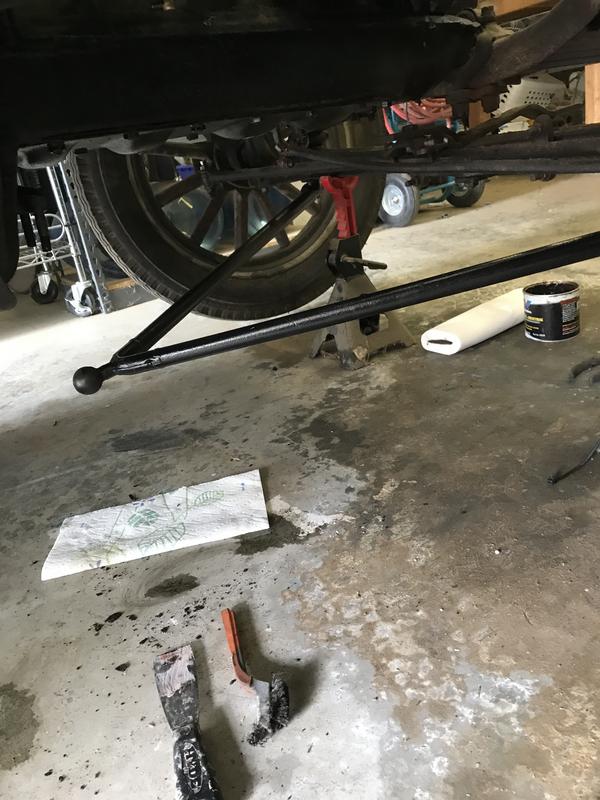 Mine was worn out and needing replacing. The part that wears is the ball on the end of the wishbone, and the cup it rests in. In my case, the ball diameter varied by 0.040 inch depending on which axis measured. The cap that holds the ball was also very worn. The cap should contact the ball tightly. Here is mine, and you can see the sloppy fit. 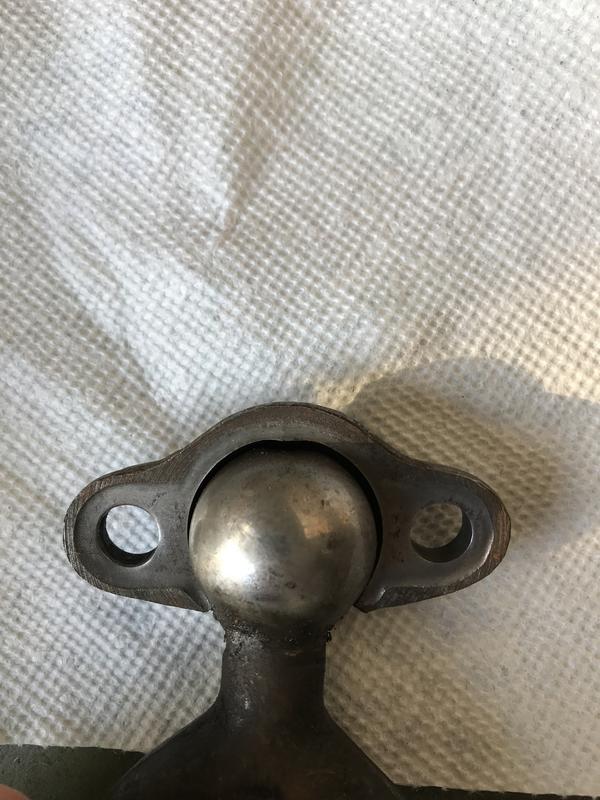 Picked up a new wishbone at my buddy’s place. Here is the old one in back, and the new wishbone in front 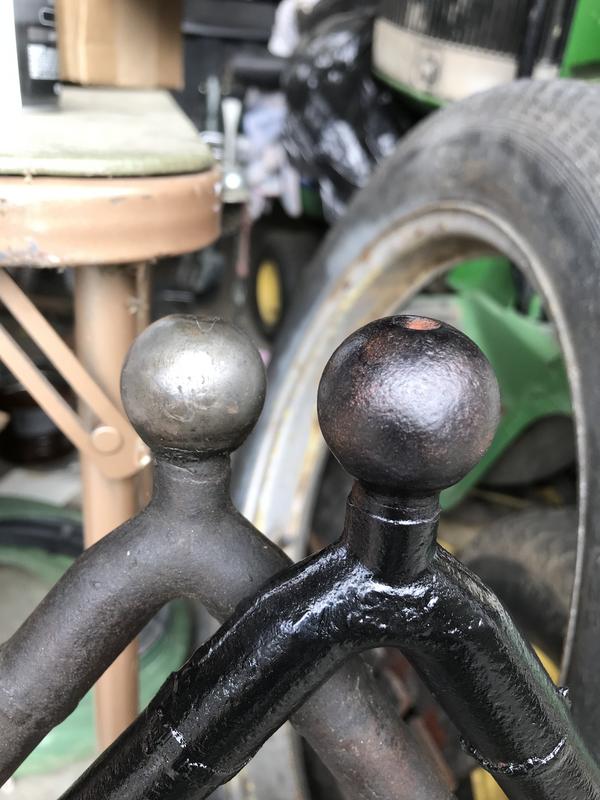 Removal consists of two 15/16 nuts in the front, and two 9/16 nuts at the cap. My cap was too hammered to reuse, and the mount riveted to the pan was also worn. This pic is a little dark, but you can see the mount 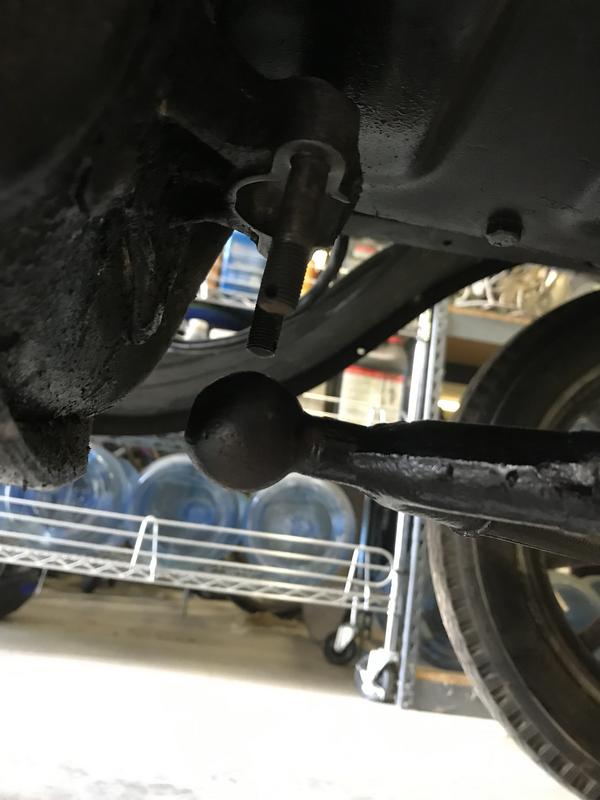 Wear in this mount is common problem, and aftermarket caps were made to take up the slop. Here is the original cap (top) and an adjustable cap. 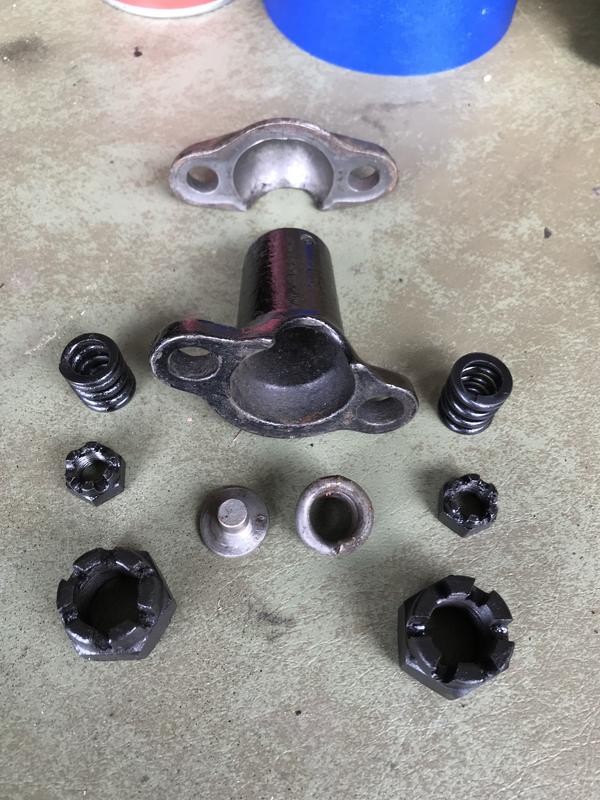 The adjustable cap has a spring loaded pad that you snug down with a large set screw 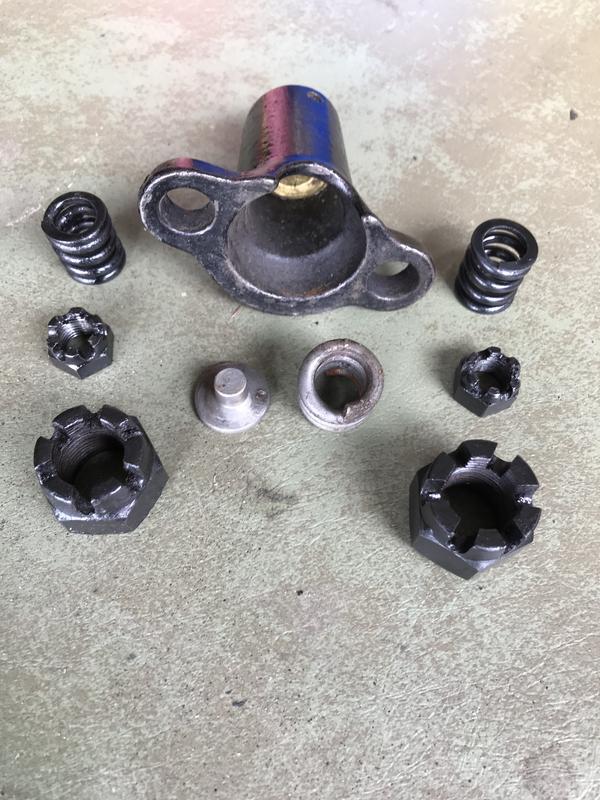 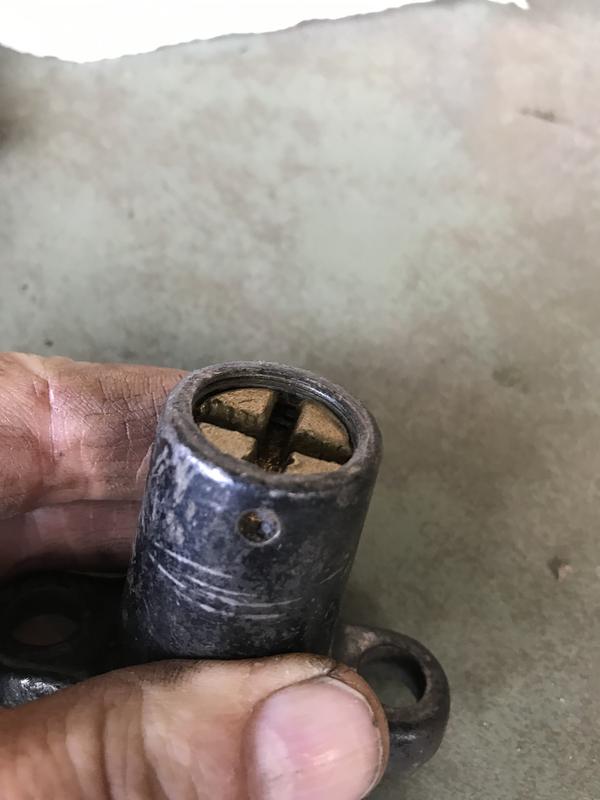 The new wishbone gets loosely bolted to the front axle, and the ball-end is jacked up to set it in the mount  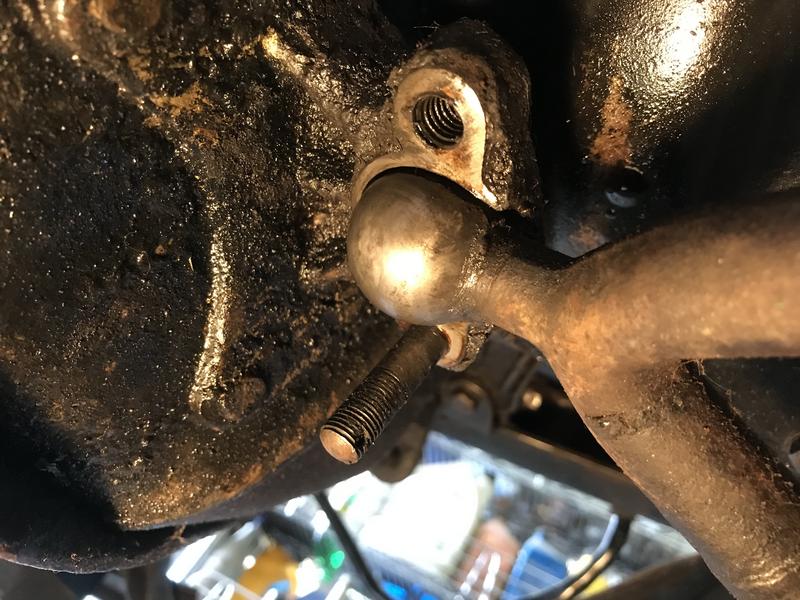 Then the adjustable cap is bolted on 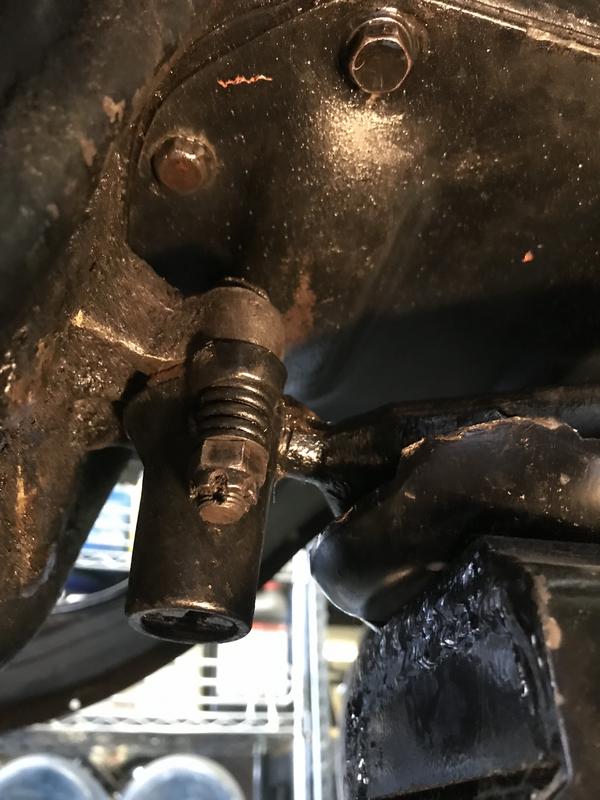 Model T’s live on axle grease and cotter pins. The wishbone took 5 cotter pins. One each at the front axle nuts, two at the cap nuts, and one to secure the cap adjusting screw 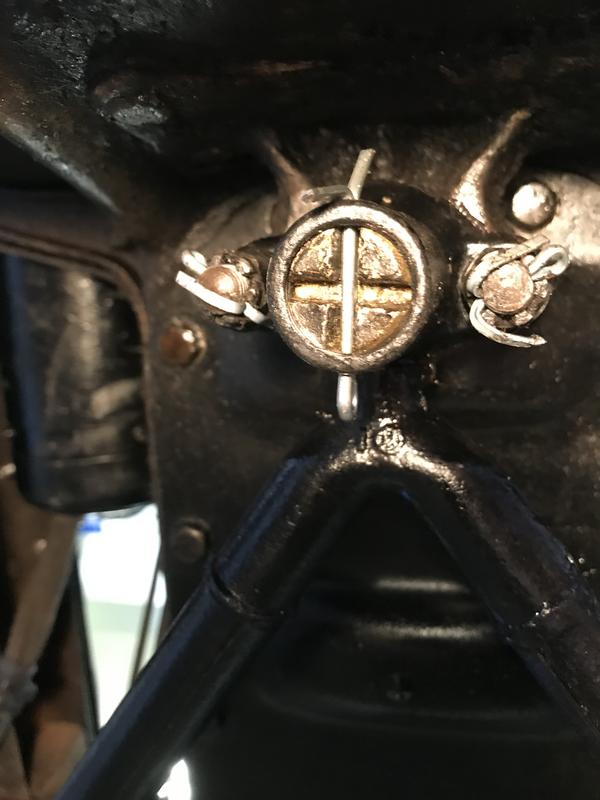 One more job done. Hopefully this will make the old girl handle better. I remember she used to wiggle all over the road at any speed over 20 mph. Next up is Part 2 of the hand winch. Still to come is installation of hydraulic brakes and radiator. |
| Wed Apr 24, 2019 3:41 pm |
|
|
Site Supporter Location: Tacoma Joined: Sat May 4, 2013 Posts: 6214 |
Got back on the hand winch. It was one rusty beast
 The pawl was laying loose on the winch table. Needed to figure that out first Here is the concept I came up with for the pawl, using stuff I had laying around  Then it was time to disassemble Bearing caps came off first   Then the drive axle 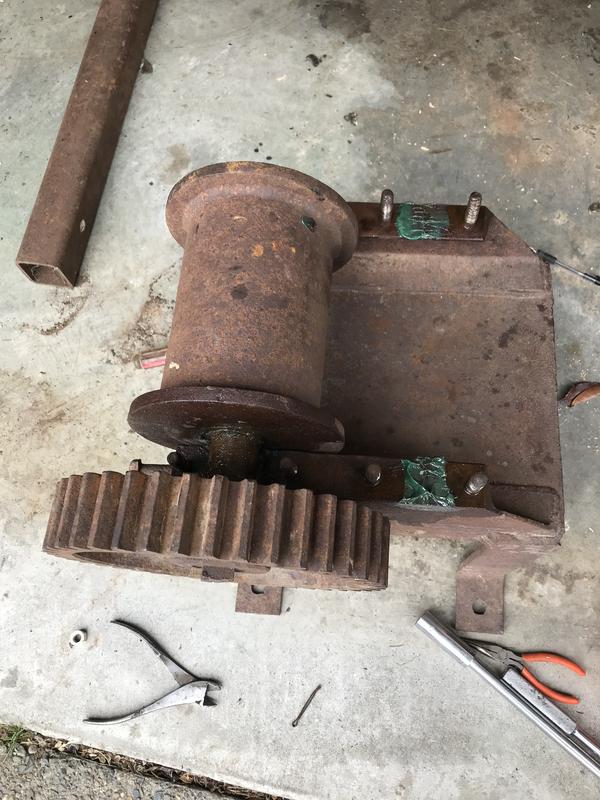 And finally the spool  Then everything gets a good going over with a wire brush cup to remove surface rust 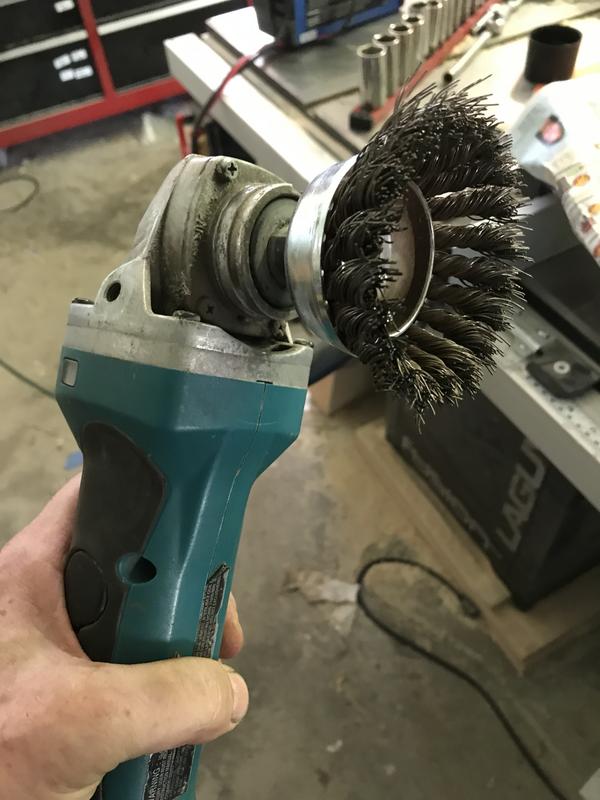 Hit everything with a rust converter, that goes on clear and turns the metal black  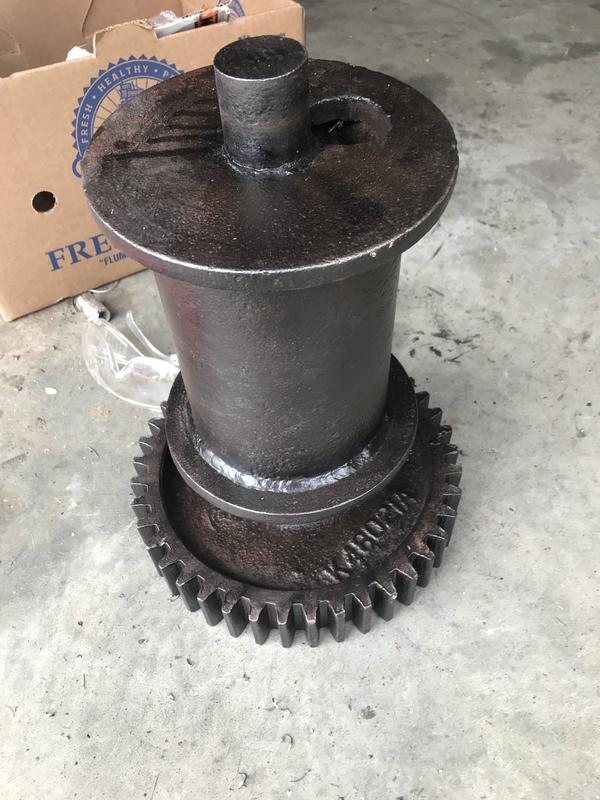  Then it was time for the color. Since I am building a military themed truck, the winch parts got painted olive drab 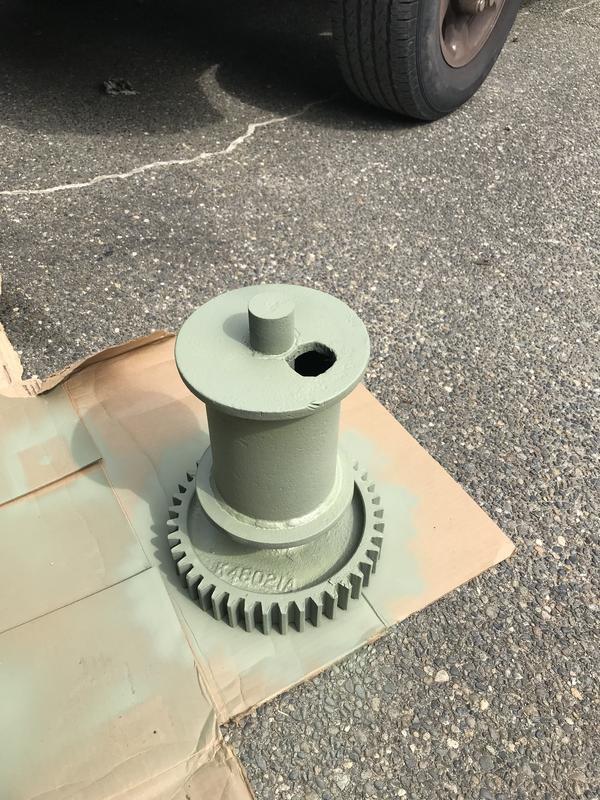 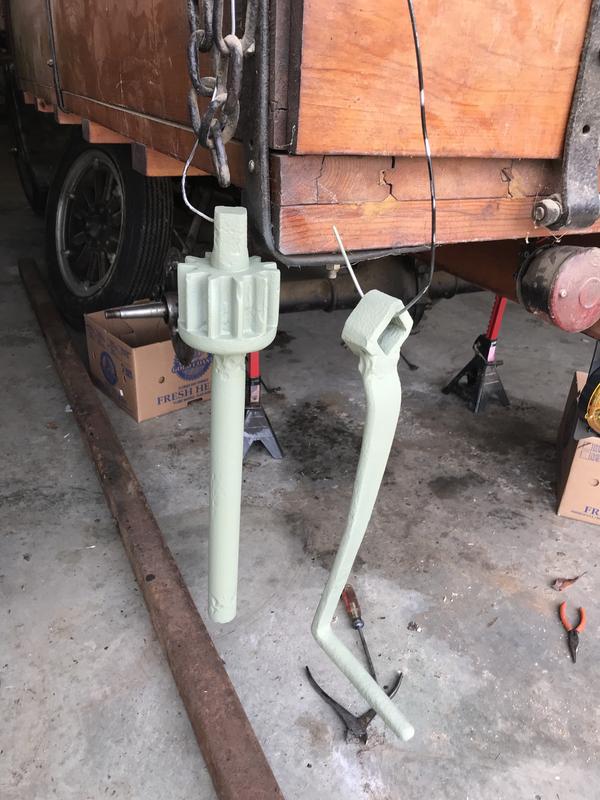 I used a big eyebolt for a fairlead 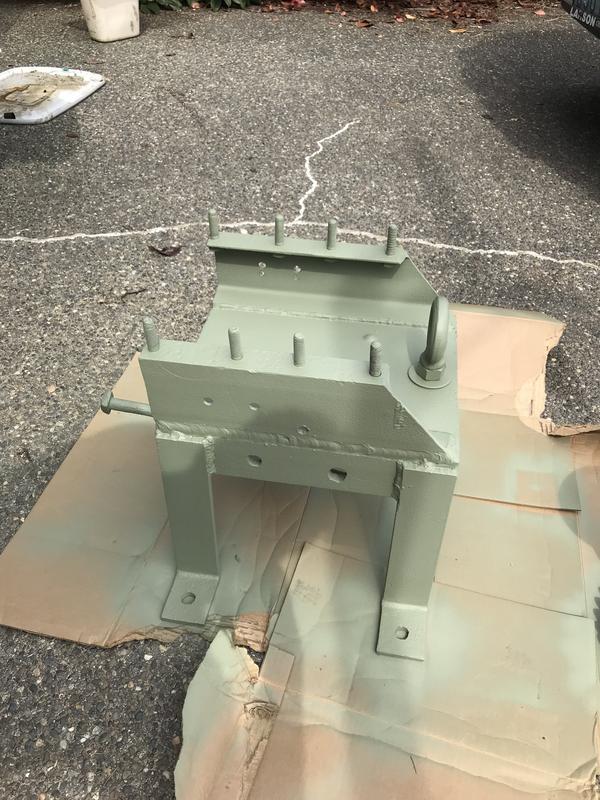 And here it is back together    The final pawl installation  All that is left is to spool on some 5/16 wire rope, make a mounting cradle out of this 10 foot section of 3 x 3 steel, and mount the winch in the truck 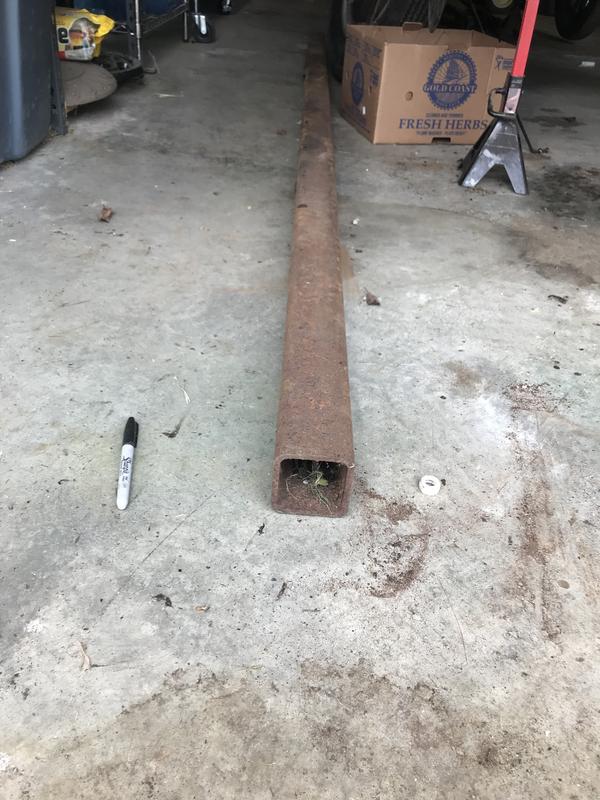 Next up is some auxiliary flashing lights front and rear, because I will be moving slow. Then I will dive into fitting hydraulic brakes onto the old girl. |
| Thu Apr 25, 2019 3:56 pm |
|
|
Site Supporter Location: Tacoma Joined: Sat May 4, 2013 Posts: 6214 |
Slow vehicles are often equipped with flashing yellow lights. Since my truck cannot exceed 30 mph except in free fall, I thought I would figure out some lights that would fit in with my military theme.
Picked up four flashing yellow led lights from amazon. They run on AA batteries and have magnets on the back. But when I tested the magnets they weren’t that strong. A rough ride (and that’s what a Model TT provides in spades) can cause them to slide down and fall off. So some kind of bracket was required to keep them in place. And, something that also looked like a fog light with a lens guard would be in keeping with the military theme. Looking around the shop, I found a wire stand that held up my No on 1639 yard sign 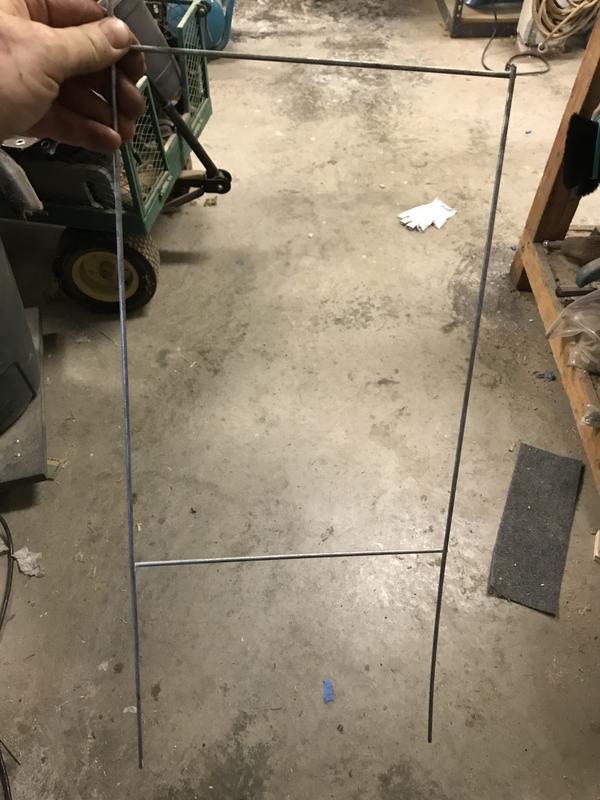 Chopped it up into 5 inch lengths and threaded each end to 8-32 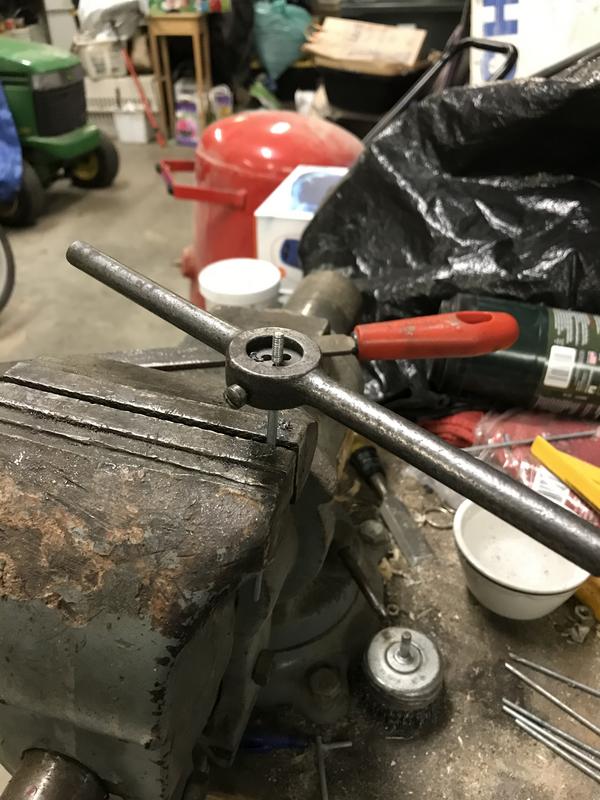 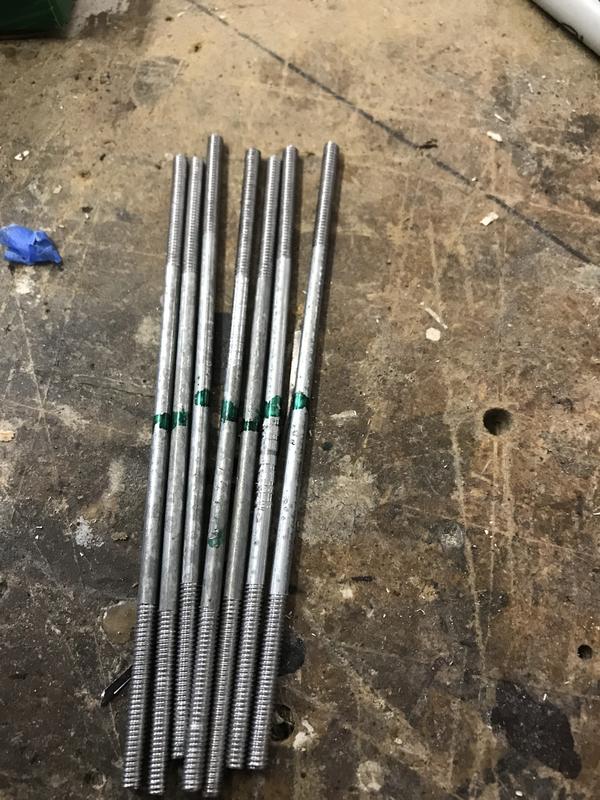 Then bent each rod 90 degrees 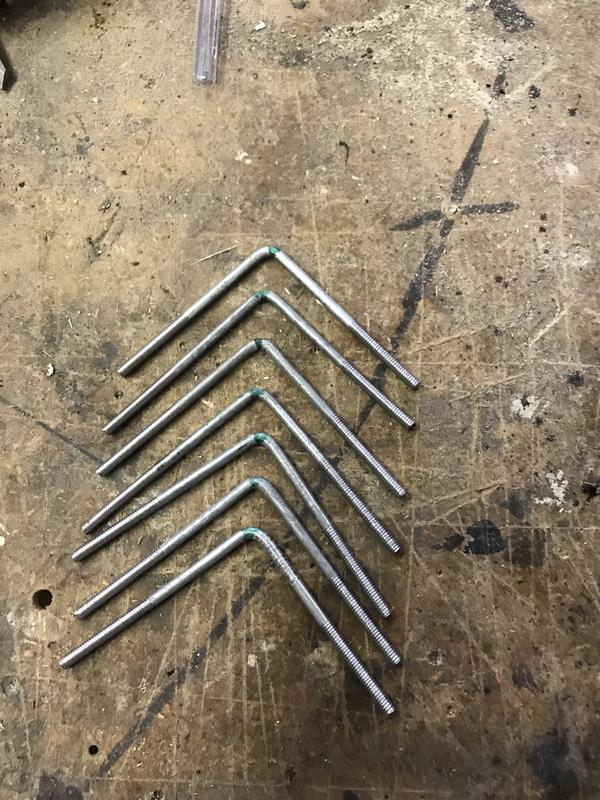 Into the vise to hold it, then bend the legs inward to vertical, and then downward 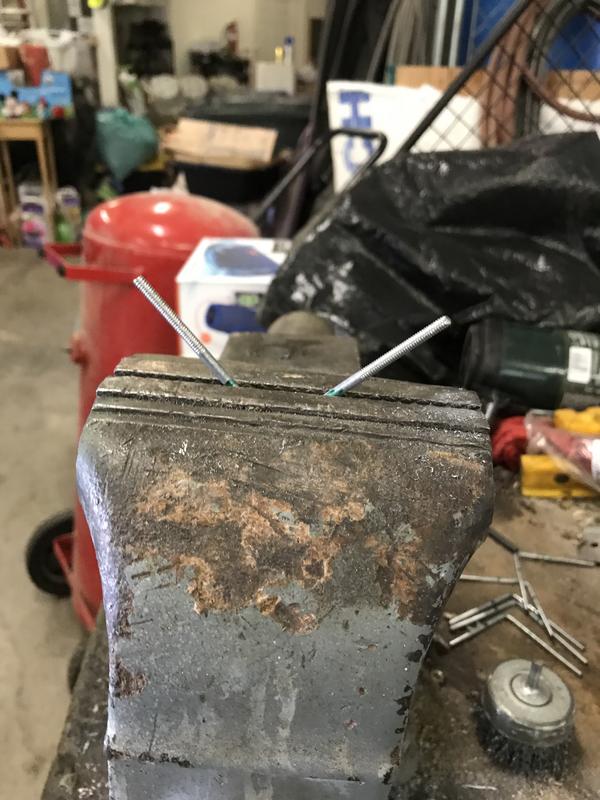 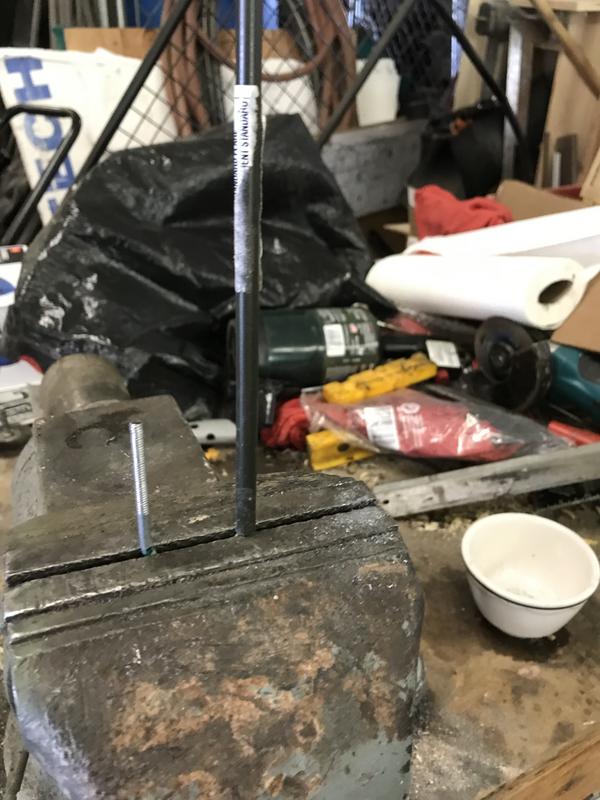  Ended up with this 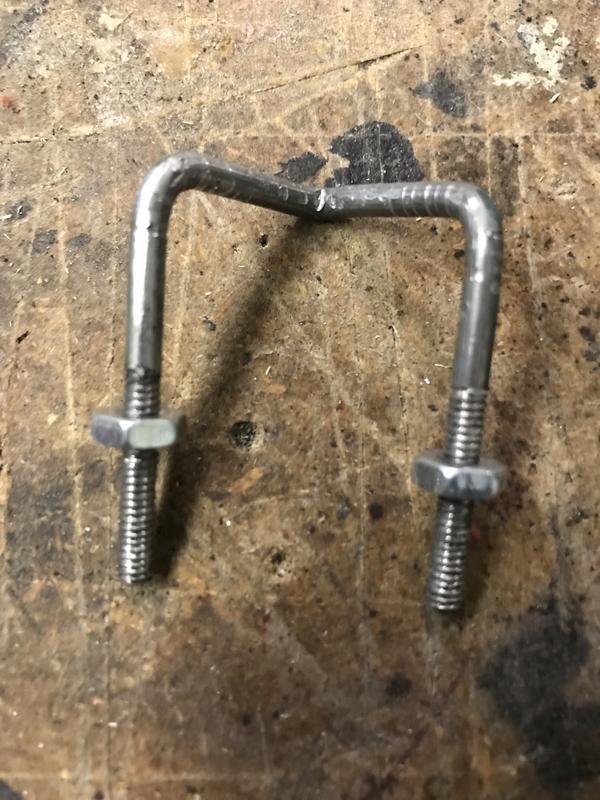 Squirted some paint on them 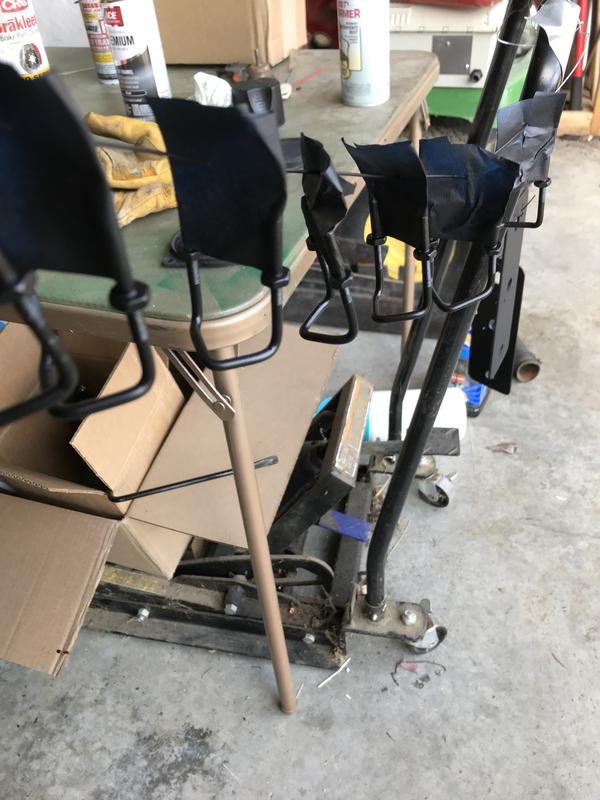 Now it was time for the mounting plates. Scrounged some steel from some used 4 x 6 stirrup brackets. The rear mounts were cleaned up, bent to 90 degrees and painted 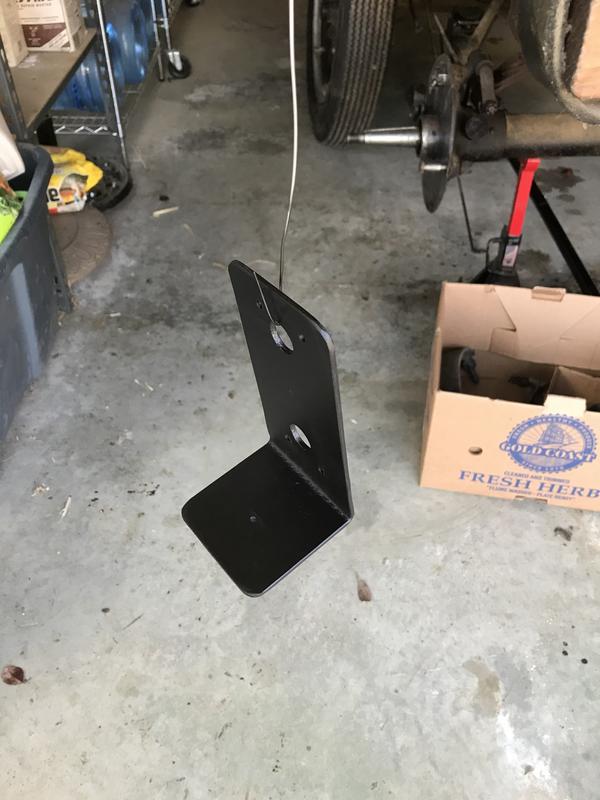 Then the brackets were added 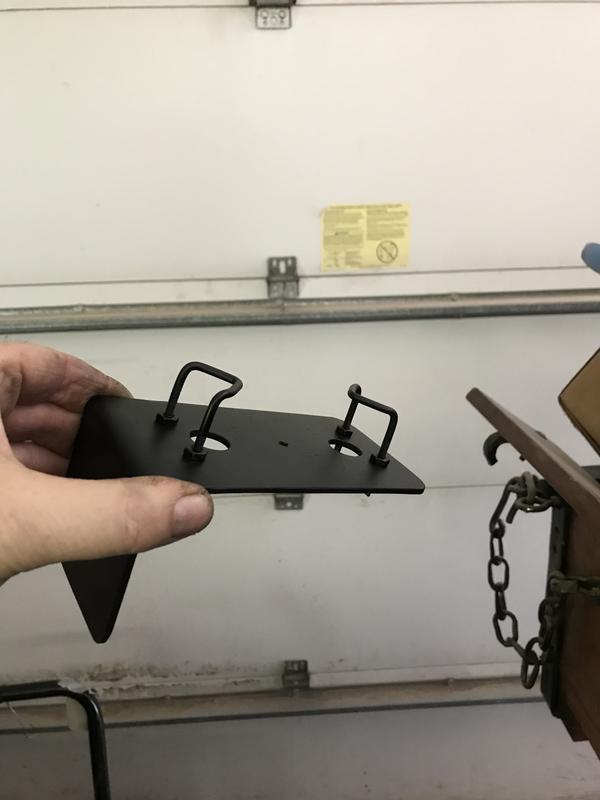 Here is what the rear lights look like on the truck  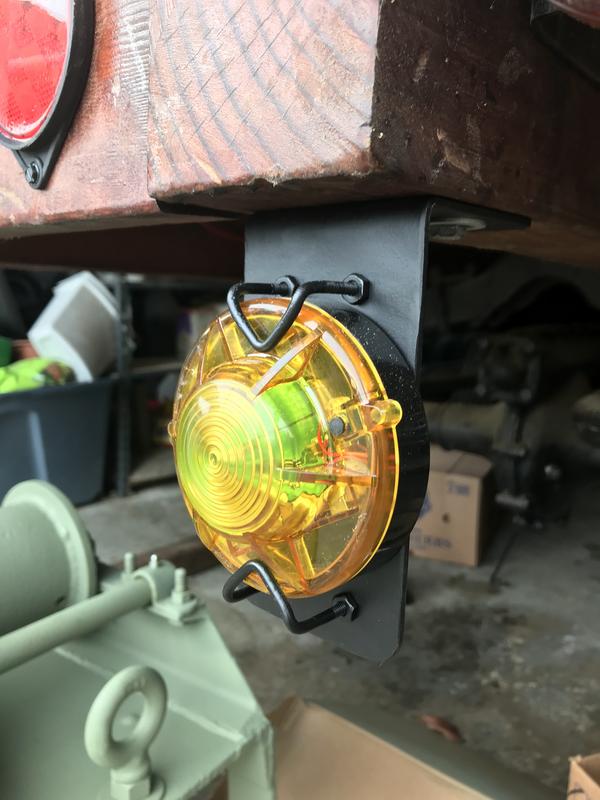 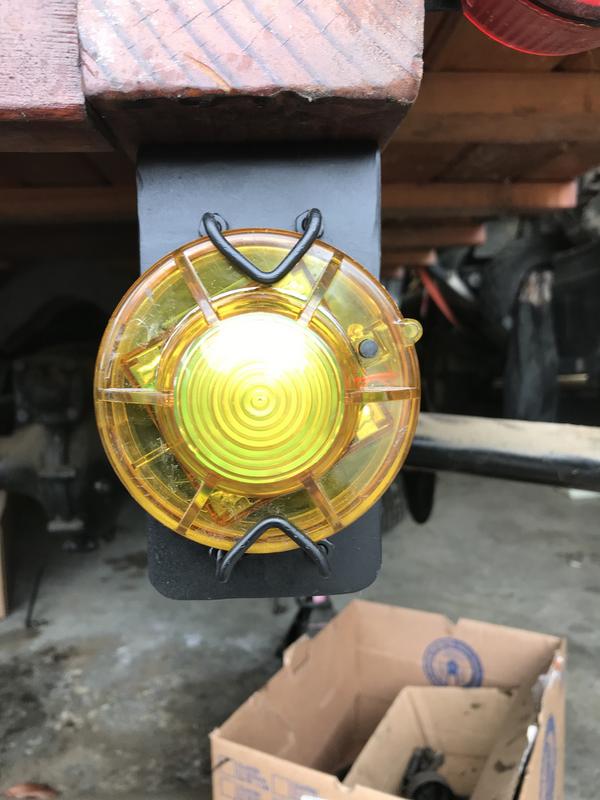 The front mounts were pretty simple, and were made from the same scrap as the rear mounts 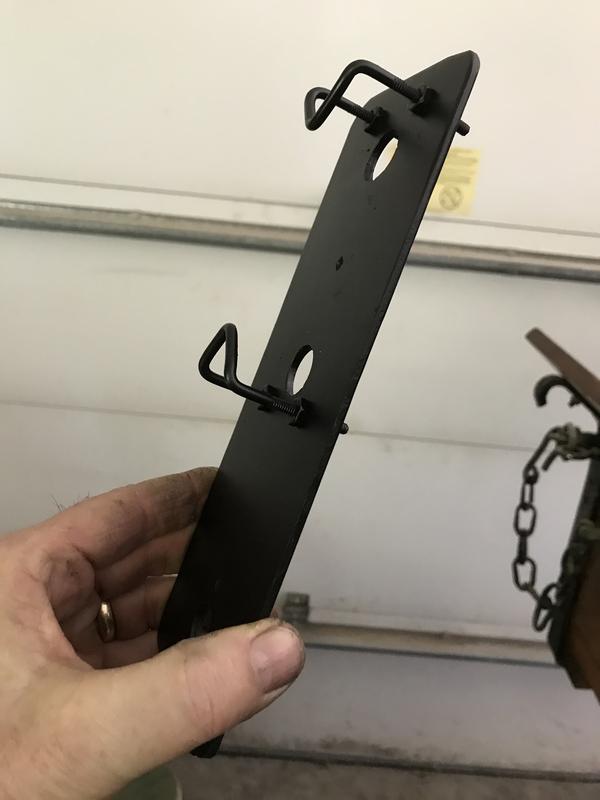 Here they are mounted to the front bumper 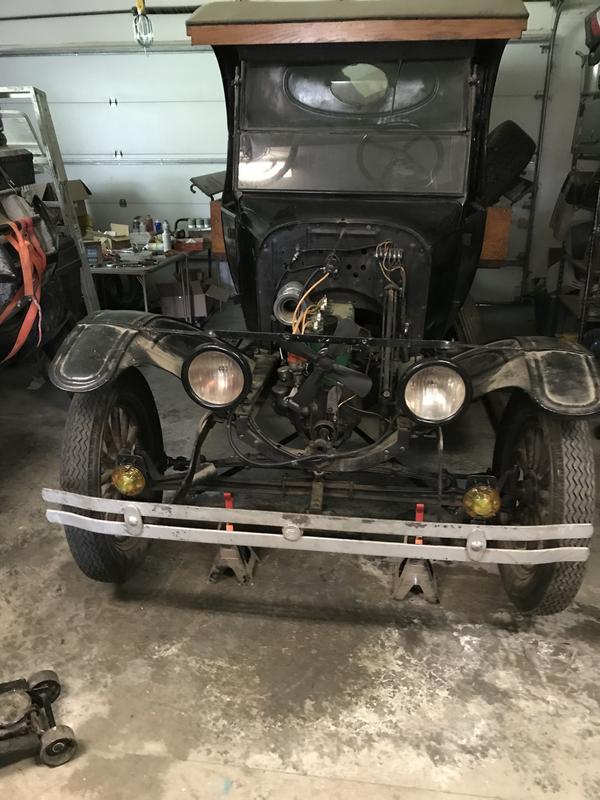 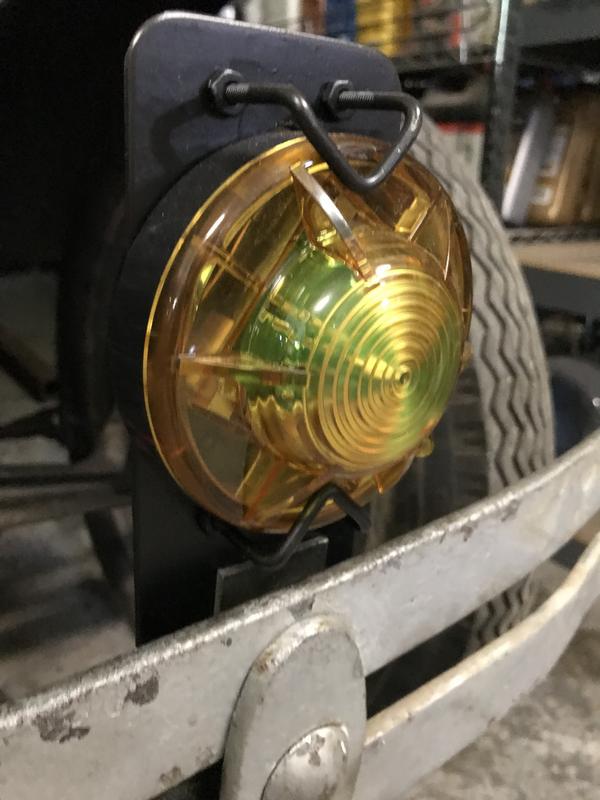 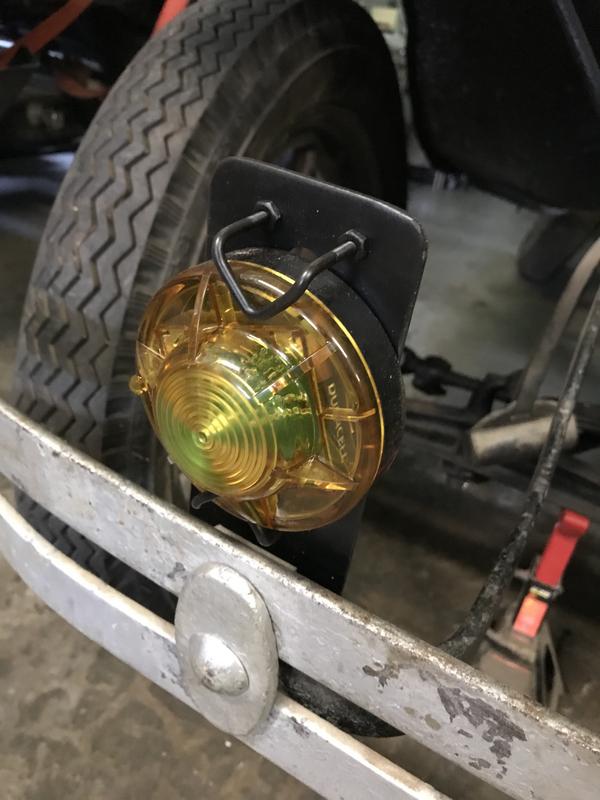 Next up is the hydraulic brakes. That’s going to be a big job. Last edited by Arisaka on Fri Apr 26, 2019 5:57 pm, edited 1 time in total. |
| Fri Apr 26, 2019 4:33 pm |
|
|
|
Page 9 of 31 |
[ 454 posts ] | Go to page Previous 1 ... 6, 7, 8, 9, 10, 11, 12 ... 31 Next |
|
All times are UTC - 8 hours |
Who is online |
Users browsing this forum: No registered users and 25 guests |
| You cannot post new topics in this forum You cannot reply to topics in this forum You cannot edit your posts in this forum You cannot delete your posts in this forum You cannot post attachments in this forum |