
|
It is currently Tue Apr 23, 2024 8:32 pm |
|
All times are UTC - 8 hours |
 |
|
|
Page 2 of 2 |
[ 22 posts ] | Go to page Previous 1, 2 |
| Print view | Previous topic | Next topic |
Beginner AR lower assembly tips
| Author | Message |
|---|---|
|
Site Supporter  Location: In my Cave near the Cloquallum Joined: Thu Sep 26, 2013 Posts: 7807 Real Name: Jim Sr. |
os2firefox wrote: Caveman Jim wrote: os2firefox wrote: The only tool I used for assembling a lower is pliers with electrical tape on the tips. Well that and the wrench for the buffer tube. Before you start tapping in that bolt catch retaining pin put some electrical tape on the side of the lower where you're hammering to protect the Finish.  I tap the pin gently with the taped up tips on the pliers to get it started then just squeeze them in. Shazam, that werks too. I use a roll pin starter punch nowadays. _________________ "You are either with us...as Americans. Or, You are against us. There is no IN BETWEEN." ??? "We cannot negotiate with those who say, 'What's mine is mine, and what's yours is negotiable.'" JFK "Those who would give up essential Liberty, to purchase a little temporary Safety, deserve neither Liberty nor Safety” -Ben Franklin MadPick wrote: I don't think you beat your children enough.  |
| Wed Nov 21, 2018 12:17 am |
|
|
Site Supporter  Location: Everett Joined: Mon Apr 22, 2013 Posts: 3421 Real Name: Ron |
I never used to worry about staking the castle nut that secures the buffer tube to the lower receiver until I had an AR pistol tube that backed out on me without me noticing. Had there been a buttstock installed I would've noticed the discrepancy. The pistol tube backed out and the AR pistol failed after the buffer retaining pin and spring popped out and became lodged in the FCG.
So I looked for and found an easy way to stake all of the castle nuts on my AR builds without marring the finish on the end plate or castle nut. I have two tools that I use. First is a pneumatic center punch. Starrett makes some top of the line models but you can get a Pittsburgh brand pneumatic punch from Harbor Freight tools for pretty cheap. These punches come with sharp pointy tips that help you avoid slippage when choosing and beginning your staking location. The pneumatic function of the punch is actuated by simply pressing down on the tool and allows for better precision than striking with a mallet or hammer. This link is to the Harbor Freight model: https://www.harborfreight.com/spring-loaded-center-punch-621.html The second tool I use is this spring loaded nail set/counter punch. I use this after I get an indent started with the pneumatic punch. This tool is spring loaded and carries a little more weight so that I can push a little more material into the notch that I am staking. The tool I use for this is in the link below. This is a link to the spring loaded punch: https://www.amazon.com/Spring-Tools-32R02-1-Counter-Punch/dp/B0006Q4I60 When I'm done staking my castle nut I use a Birchwood Casey Super Black Touch Up pen to cover up any exposed metal that resulted from the staking process. https://shop.birchwoodcasey.com/super-black-touch-up-pen-flat-black/ Here is a video that helped me when I first began staking the castle nuts on all of my builds. |
| Wed Nov 21, 2018 11:55 am |
|
|
Site Supporter  Location: Puyallup, WA Joined: Sun Feb 23, 2014 Posts: 224 Real Name: Richard |
survivor wrote: Bolt catch installation For those of you with access to a drill press. Clamp your receiver into a vice. And press the pin into the receiver. Do not turn on the spindle/drill ! Your only using the machine as a press. . 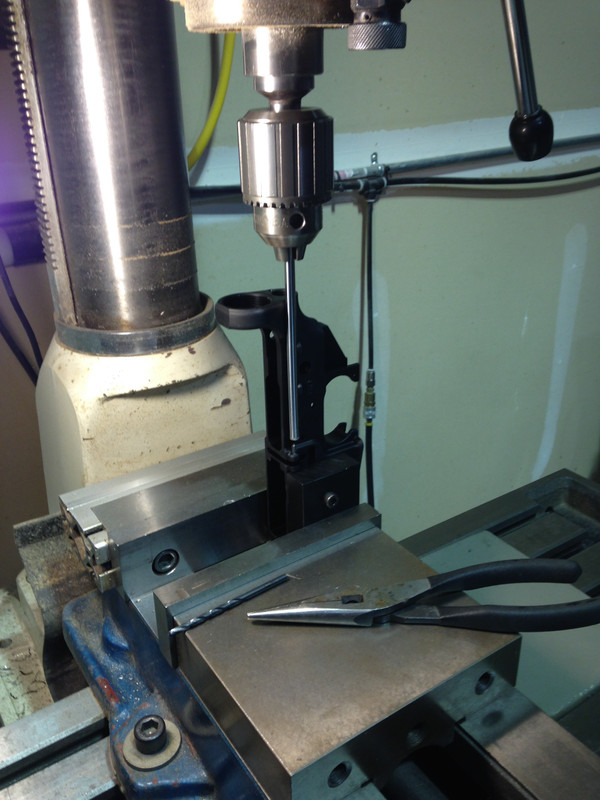 . 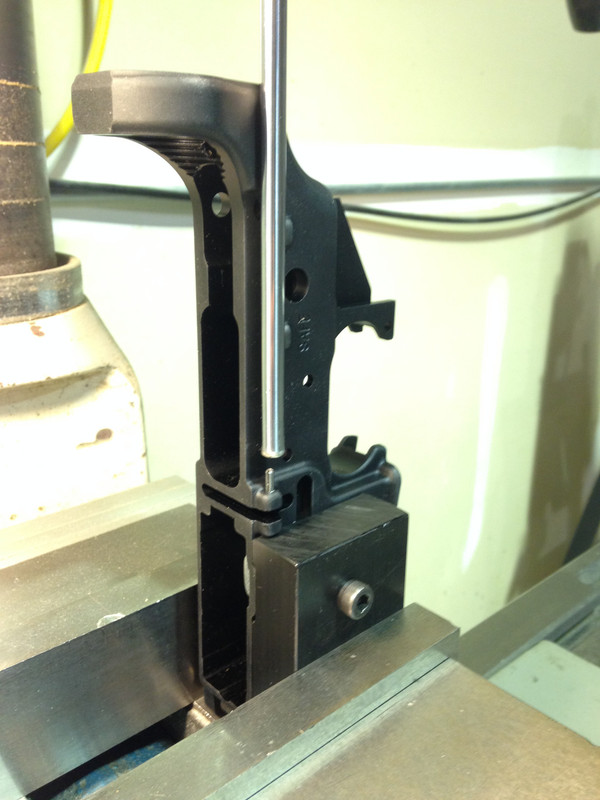 .  I used my vice as a "press" when I built my first one. Did this on both the bolt catch pin and trigger guard pin. |
| Sun Dec 30, 2018 12:50 pm |
|
|
Site Supporter Location: Puyallup, WA Joined: Sun Feb 23, 2014 Posts: 224 Real Name: Richard |
I used this video for my first build. It covers the entire build, but is broken down step by step by time stamp in the description.
|
| Sun Dec 30, 2018 12:53 pm |
|
|
In Memoriam Joined: Wed Mar 6, 2013 Posts: 12018 |
 I am very grateful for all these tips. I'm hoping to start my first AR build soon. I am very grateful for all these tips. I'm hoping to start my first AR build soon. |
| Sun Dec 30, 2018 1:13 pm |
|
|
Site Supporter  Location: Everson, WA Joined: Sun Jan 6, 2013 Posts: 28187 Real Name: Ace Winky |
PMB wrote: :bow: I am very grateful for all these tips. I'm hoping to start my first AR build soon. I think I started this thread for selfish lazy reasons! All the tips in one easy spot. Hahahahaaha I need to start one on Glock assembly fun.......crap that is easier. _________________ Why does the Penguin in Batman sound like a duck? Because the eagle sounds like a hawk. |
| Sun Dec 30, 2018 4:49 pm |
|
|
Site Supporter Location: East Renton Plateau Joined: Tue Jul 5, 2011 Posts: 914 |
For trigger installation a short piece of a 16 (iirc) nail makes a great slave pin. Just cut the nail a little narrower than the trigger itself, install the disconnector, holding it in place with the slave pin. Then put the trigger in the lower and push the slave pin through with the trigger pin. Tapering the ends of the slave pin helps guide it through the other side of the lower.
Sent from my SM-N960U using Tapatalk |
| Mon Dec 31, 2018 9:41 am |
|
|
|
Page 2 of 2 |
[ 22 posts ] | Go to page Previous 1, 2 |
|
All times are UTC - 8 hours |
Who is online |
Users browsing this forum: No registered users and 21 guests |
| You cannot post new topics in this forum You cannot reply to topics in this forum You cannot edit your posts in this forum You cannot delete your posts in this forum You cannot post attachments in this forum |